


June 29, 2018
OBDSTAR P001 Programmer manual forX300 DP Plushere:
1:P001ProgrammerFeatures

On the basis of original adapter features, P001 programmer, integrated with theEEPROM adapter, RFID adapterandKey Renew adapter, is a multifunctional programmer.
It brings a brand new experience, which not only allowsautotechnician to reduce more cumbersomeprocedures,but also can be compatible with simulated smart keys to realize the Toyota all lost.
P001programmer uses dual coils withstrongersignal, supporting a wider range of RFID. It is also required in recent model upgrades, as follow:
- Ferrari458/F12/F149;
- Maseratimechanical key;
- Fiat500/Viaggio/Palio/Siena/Boyue/Pailang/Ottimo, etc.
- Iveco;
- Alfa Romeo;
- VolkswagenMQB;
- Toyota5 simulated cards;
- BMW;
- Porsche;
2:P001 Programmer Configurations

P001 programmer :
P001 programmer unit + C001 circuit board + C002 circuit board + W001 data cable + W002 data cable + W003 data cable + Toyota simulated smart keys (free);
Remark: Customer purchasing P001 programmer can obtain a set of Toyota simulated smart keys for free.
3:P001 Programmer Accessories
Accessory 1:C001circuit board
C001circuit board is compatible with old NO. 3 and 4 circuit boards, applying to EEPROM chip dismantling and reading, Tianjin FAW and VIZHI immobilizer coil initialization and other functions.

Accessory 2:C002circuit board
The newly developed C002 circuit board is connected by W001, W002 or W003 without welding the chip.

Accessory 3:W001 data cable
W001 data cable can read or write data by linking the chip with a bonding wire

Accessory 4:W002 data cable
W002 data cable can read or write data by clamping the chip (SOP 8-pin) directly without welding EEPROM.

Accessory 5:W003data cable
W003 data cable can read or write data by clamping positive pole and negative pole with red and black clips and contacting the data interface with yellow and blueprobes.
4:Wiring Instruction
To better understand the connection among P001 programmer and its accessories, examples for W001 and W003 wiring instructions are as below. (During the actual operation process, there is a diagram of wiring inside tablet)
Way 1. W001 Connecting

Way 2. W003 Connecting

AboutToyota simulated smart key
- Why use a Toyota simulated smart key?
For the Toyota/Lexus 2007-2016 models, if all smart keys are lost, the instrument table must be removed and the ECU must be replaced. The cost is very high!
This Toyota simulated smart key can generate a Toyota key with our devices in the case of all keyslost,so the ignition switch can be turned on, and then a new smart key can be added and programmed with our devices.
- What are the advantages of the Toyota simulated smart key?
- Save costs;
- How many types of Toyota simulated smart keys in total?
There are 4 types at present, and the 5thone is in development.
- Which type of smart keys can be simulated?
Simulated key 1 applies to the vehicle with94/D4type of smart key;
Simulated key 2 applies to the vehicle with 98 type of smart key;
Simulated key 3 applies to the vehicle with88/A8type of smart key;
Simulated key 4 applies to the vehicle withA9type of smart key;

Connection method for instrument activation (as shown below)

Src:
http://blog.obdexpress.co.uk/2018/06/28/how-to-use-obdstar-p001-programmer-with-x300-dp-plus/
Posted by: OBDexpress.co.uk at
01:49 AM
| No Comments
| Add Comment
Post contains 502 words, total size 10 kb.
OBDSTAR P001 Programmer manual forX300 DP Plushere:
1:P001ProgrammerFeatures
On the basis of original adapter features, P001 programmer, integrated with theEEPROM adapter, RFID adapterandKey Renew adapter, is a multifunctional programmer.
It brings a brand new experience, which not only allowsautotechnician to reduce more cumbersomeprocedures,but also can be compatible with simulated smart keys to realize the Toyota all lost.
P001programmer uses dual coils withstrongersignal, supporting a wider range of RFID. It is also required in recent model upgrades, as follow:
- Ferrari458/F12/F149;
- Maseratimechanical key;
- Fiat500/Viaggio/Palio/Siena/Boyue/Pailang/Ottimo, etc.
- Iveco;
- Alfa Romeo;
- VolkswagenMQB;
- Toyota5 simulated cards;
- BMW;
- Porsche;
2:P001 Programmer Configurations
P001 programmer :
P001 programmer unit + C001 circuit board + C002 circuit board + W001 data cable + W002 data cable + W003 data cable + Toyota simulated smart keys (free);
Remark: Customer purchasing P001 programmer can obtain a set of Toyota simulated smart keys for free.
3:P001 Programmer Accessories
Accessory 1:C001circuit board
C001circuit board is compatible with old NO. 3 and 4 circuit boards, applying to EEPROM chip dismantling and reading, Tianjin FAW and VIZHI immobilizer coil initialization and other functions.
Accessory 2:C002circuit board
The newly developed C002 circuit board is connected by W001, W002 or W003 without welding the chip.
Accessory 3:W001 data cable
W001 data cable can read or write data by linking the chip with a bonding wire
Accessory 4:W002 data cable
W002 data cable can read or write data by clamping the chip (SOP 8-pin) directly without welding EEPROM.
Accessory 5:W003data cable
W003 data cable can read or write data by clamping positive pole and negative pole with red and black clips and contacting the data interface with yellow and blueprobes.
4:Wiring Instruction
To better understand the connection among P001 programmer and its accessories, examples for W001 and W003 wiring instructions are as below. (During the actual operation process, there is a diagram of wiring inside tablet)
Way 1. W001 Connecting
Way 2. W003 Connecting
AboutToyota simulated smart key
- Why use a Toyota simulated smart key?
For the Toyota/Lexus 2007-2016 models, if all smart keys are lost, the instrument table must be removed and the ECU must be replaced. The cost is very high!
This Toyota simulated smart key can generate a Toyota key with our devices in the case of all keyslost,so the ignition switch can be turned on, and then a new smart key can be added and programmed with our devices.
- What are the advantages of the Toyota simulated smart key?
- Save costs;
- How many types of Toyota simulated smart keys in total?
There are 4 types at present, and the 5thone is in development.
- Which type of smart keys can be simulated?
Simulated key 1 applies to the vehicle with94/D4type of smart key;
Simulated key 2 applies to the vehicle with 98 type of smart key;
Simulated key 3 applies to the vehicle with88/A8type of smart key;
Simulated key 4 applies to the vehicle withA9type of smart key;
Connection method for instrument activation (as shown below)
Src:
http://blog.obdexpress.co.uk/2018/06/28/how-to-use-obdstar-p001-programmer-with-x300-dp-plus/
Posted by: OBDexpress.co.uk at
01:49 AM
| No Comments
| Add Comment
Post contains 502 words, total size 10 kb.
June 28, 2018
How to useKTMflashto read/write ECUs (Infineon, gearbox, etc) here:
1You have to use software fromobdexpress.co.uk
2 ECU flash
and the like cannot be installed in your PC/laptop before; that is, for your PC/laptop, it must be the first time to install KTMflash software.
You’re asked to re-install a cleanoperationsystem and install KTMflashswwith the help of a video of installation tutorial; otherwise, your device would be locked.
Video: How to install KTMflash for ECU read/write
3 Here are folders

(KTMflash English... and KTMflash software...) inside the CD you should have. You can find out software and real tests which helps you a lot to use KTM flash.
4 The reason for why do you buy KTMflash isthat,it’s good at reading Infineon ECUs and gearbox (transmission) ECU.
5 When you are readingencyptedInfineon or ECUs, please read the password file (with reference to our video here). If theswasks you to TURN OFF THE POWER SUPPLY FOR 2 SECONDS, please follow it.Ifthe power is not off for 2 seconds, the pop-up mightbe appearedagain in the interface. So, just turn it off for 2s and use thesw.
6 PLEASE FOLLOW THE VIDEO AND TUTORIAL TO CHOOSE THE SWITCH YOU’RE GONNA USE.
Attachment: KTMflash ECU List
http://blog.obdexpress.co.uk/2018/06/13/ktm-flash-ecu-programmer-switch-board-user-manual/
Src:
http://blog.obdexpress.co.uk/2018/06/28/tips-ktmflash-reads-writes-ecus/
Posted by: OBDexpress.co.uk at
01:56 AM
| No Comments
| Add Comment
Post contains 213 words, total size 4 kb.
June 27, 2018
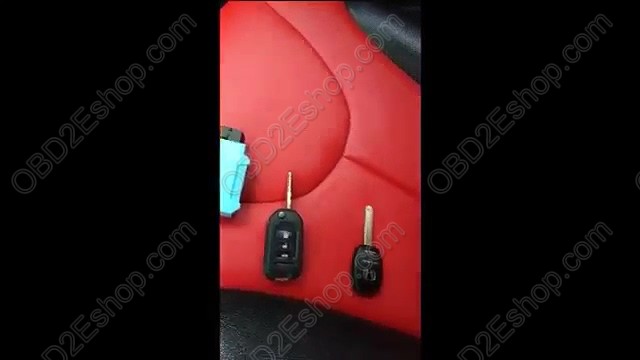
Easy Key Maker Honda key
1. This is Honda OBDII port.

2. This is EasyKeyMaker with 16pin port.
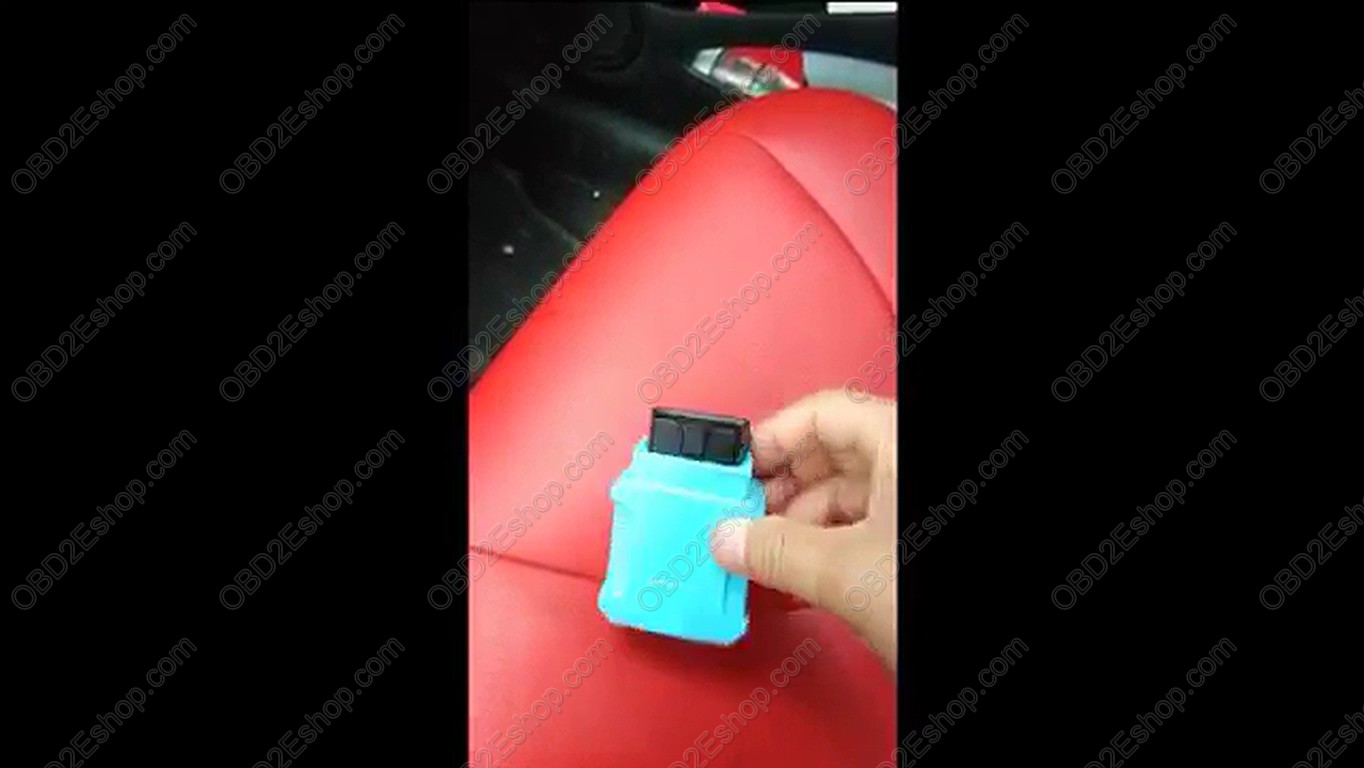
3. Prepare one
4

5. InsertEasyKeyMaker into the 16pin port.

Continue to operate by following
1). For transponder key.
A. Switch to "IMMO", and prepare all keys to register.
B. Turn ignition ON to position II(Instrument panel light on but engine OFF),
C. The buzzer periodically short beep with "Di", Turn ignition OFF.
D. The buzzer periodically short beep with "Di, Di, Di",
E. The buzzer
F. The buzzer periodically short beep with "Di", Turn ignition OFF.
G. The buzzer periodically short beep with "Di, Di", Change another key and turn ignition ON
H. Repeat step F
I. Forlastkey: First turn ignition ON/OFF following above instructions. When the buzzer periodically short beep with "Di Di", turn on
J. The buzzer long beep once "Di---", key registration finished.
K. The buzzer periodically long beep with "Di---", start to learn
Src:
Posted by: OBDexpress.co.uk at
08:50 AM
| No Comments
| Add Comment
Post contains 259 words, total size 12 kb.
For Foxwell NT520 newbie
UpdateFoxwell NT520 via USB Cable:
For the first time you use Foxwell NT520, you need to use the USB to connect NT520 machine and one computer, then use the computer to download "FoxScanner†client (download link:http://www.foxwelltech.com/product/item-340.html) to register NT520. after
If the machine is
To be able to use FoxScanner, PC or laptop must meet the following minimum requirements:
- Operation System: Win98/NT, Win ME, Win2000, Win XP, VISTA and Windows 7.
- CPU: Intel Pâ…¢ or better
- RAM: 64MB or better
- Hard Disk Space: 30MB or better
- Display: 800*600 pixel, 16 byte true color display or better
- Internet Explorer 4.0 or newer
NOTE
Before registration and updating, please make sure your network works correctly.
Foxwell NT520 user manual on register and download (Since Page 39)
http://www.obdexpress.co.uk/upload/pro/foxwell-nt520-pro-muti-system-scanner-user-manual.pdf
Foxwell NT520register:
If you want to update the car model application, you need to register the machine first. Use USB cable to connect the computer, turn on the machine and find out the management program then choose "Update†and confirm, then run "FoxScanner†on the computer,

Foxwell NT520 Update
After registering Foxwell NT520 successfully, use


Process:
During


Posted by: OBDexpress.co.uk at
01:57 AM
| No Comments
| Add Comment
Post contains 286 words, total size 5 kb.
For Foxwell NT520 newbie:How To Update&Register Foxwell NT520 Pro
UpdateFoxwell NT520 via USB Cable:
For the first time you use Foxwell NT520, you need to use the USB to connect NT520 machine and one computer, then use the computer to download "FoxScanner†client (download link:http://www.foxwelltech.com/product/item-340.html) to register NT520. after registering succeed, you can download the car software that you want and then update.
If the machine is pre-installed the car software, you can use directly.
To be able to use FoxScanner, PC or laptop must meet the following minimum requirements:
- Operation System: Win98/NT, Win ME, Win2000, Win XP, VISTA and Windows 7.
- CPU: Intel Pâ…¢ or better
- RAM: 64MB or better
- Hard Disk Space: 30MB or better
- Display: 800*600 pixel, 16 byte true color display or better
- Internet Explorer 4.0 or newer
NOTE
Before registration and updating, please make sure your network works correctly.
Foxwell NT520 user manual on register and download (Since Page 39)
http://www.obdexpress.co.uk/upload/pro/foxwell-nt520-pro-muti-system-scanner-user-manual.pdf
Foxwell NT520register:
If you want to update the car model application, you need to register the machine first. Use USB cable to connect the computer, turn on the machine and find out the management program then choose "Update†and confirm, then run "FoxScanner†on the computer, login and choose †Register Productsâ€, then the FoxScanner tool will automatically read out the SN and password. Click on "Submit†to register.
Foxwell NT520 Update
After registering Foxwell NT520 successfully, use USB cable to connect the computer, go to "Application†and choose "Updateâ€. Then run FoxScanner on the computer, log in and click on "Update†icon to update.
Process:
During update, you can see the update process, when downloading complete, press ENTER to start.
Posted by: OBDexpress.co.uk at
01:57 AM
| No Comments
| Add Comment
Post contains 285 words, total size 4 kb.
June 25, 2018
I borrowed a friend’s BMWNT510(now it has another newNT520, the same on BMW) to reset my wife’s X5 remaining mileage countdown after I refilled the DEF. I was really impressed with hisFoxwellwith all the options that were given for BMWs.
Here

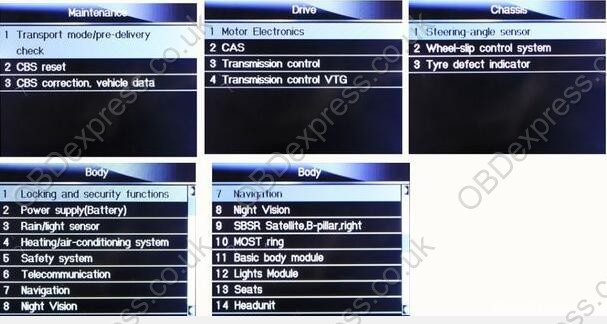
Hope it helps.
Posted by: OBDexpress.co.uk at
05:53 AM
| No Comments
| Add Comment
Post contains 70 words, total size 5 kb.
I borrowed a friend’s BMWNT510(now it has another newNT520, the same on BMW) to reset my wife’s X5 remaining mileage countdown after I refilled the DEF. I was really impressed with hisFoxwellwith all the options that were given for BMWs.
Here
Hope it helps.
Posted by: OBDexpress.co.uk at
05:53 AM
| No Comments
| Add Comment
Post contains 70 words, total size 5 kb.
June 23, 2018
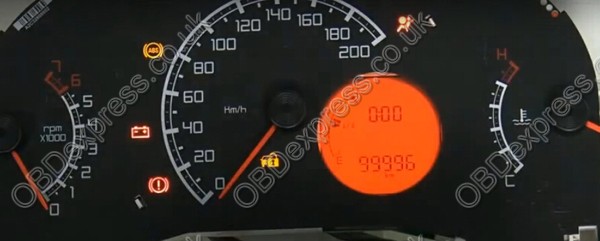
Purpose: OBD odometer correction for2010 Fiat Uno Way VDO
Toolused:Obdstar X300 DP
How-to’s: How to use OBDSTAR X300 DP to change mileage on 2010 Fiat Uno Way VDO Via OBD
Prepare:
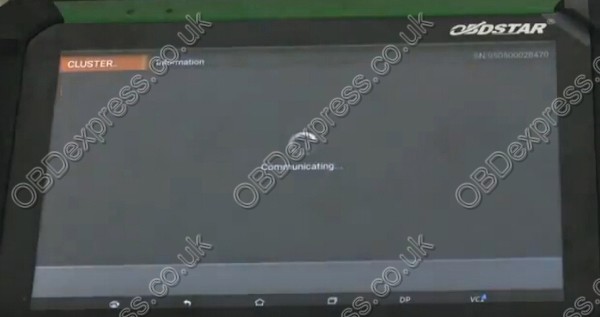
Connect X300 DP with vechile and open X300DP

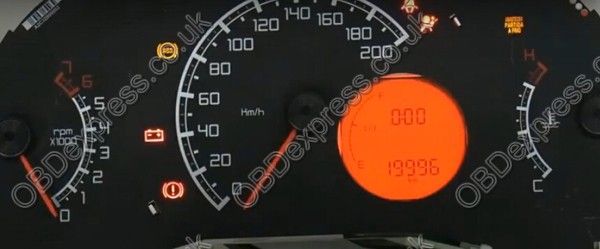
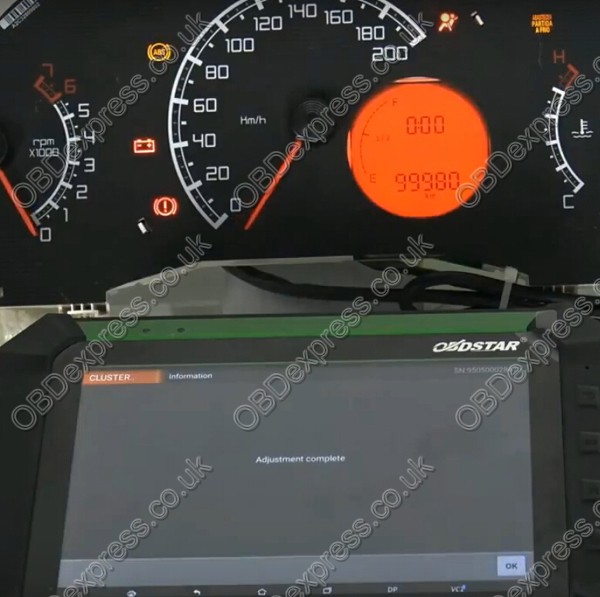
Now the odometer value as 99996
Onmainmenu, click "Diag Programâ€, choose "Cluster Calibrate†function and car maker "FIATâ€.
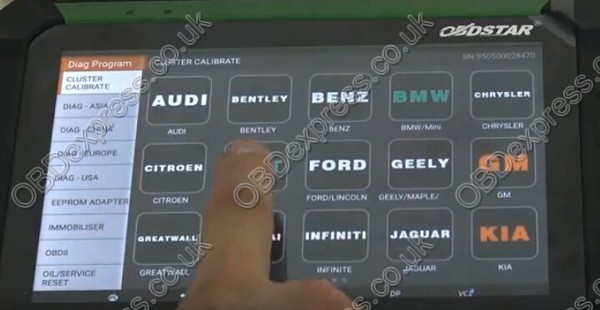
Go to newest Fiat software V31.02. Choose "Uno Way†and "VDOâ€.


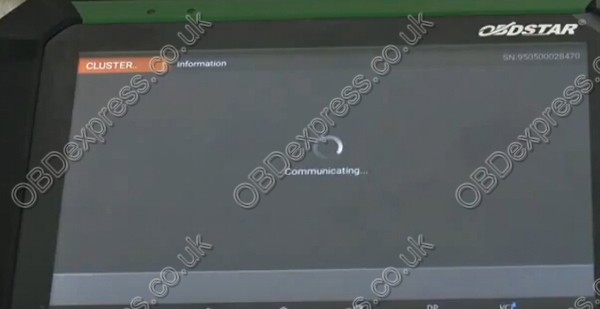
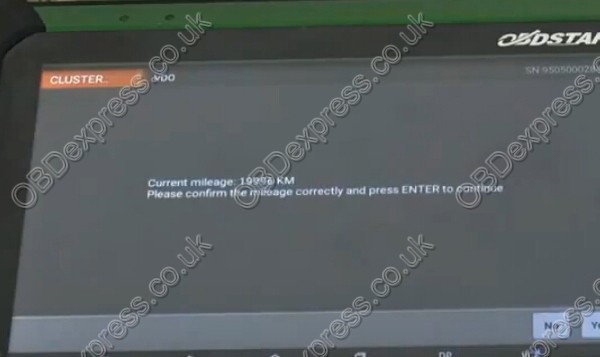
Afterthatit read out old odometer value as 99996KMclick "Yes"buttonto input a new value.


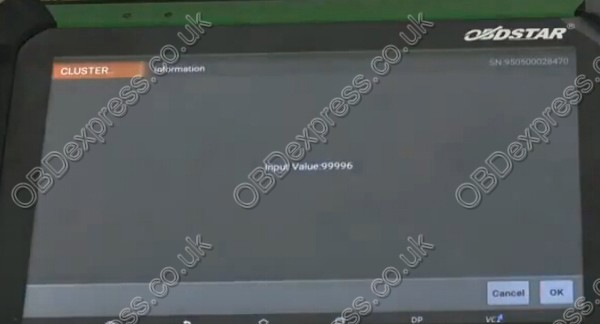
Now time to input a new mileage. In this case, enter 2000

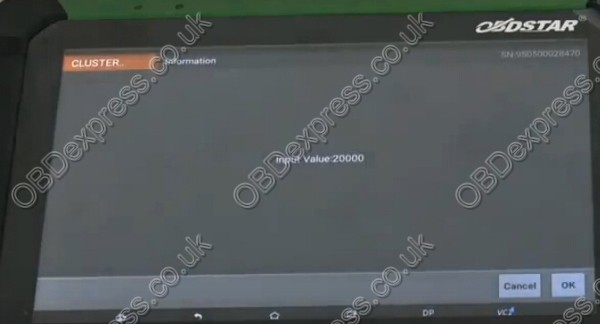
Adjustment success! Using OBDSTAR X300 DP pad successfully change OBDSTAR X300 DPdashboard mileage from old 99996 to new 19996!
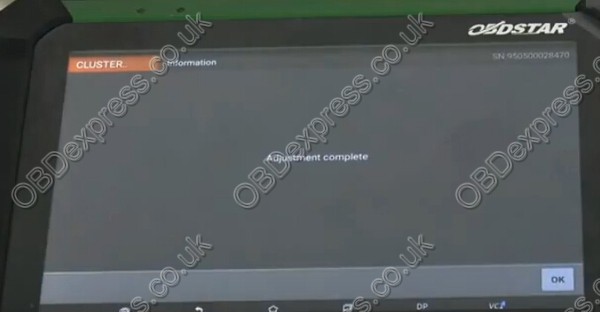
We also can change it back 99996KM,Themethod is the same as above.
Doneï¼
Src:
http://www.mileageprogrammer.com/fiat-uno-way-vdo-odometer-corretion/
Posted by: OBDexpress.co.uk at
07:04 AM
| No Comments
| Add Comment
Post contains 142 words, total size 15 kb.
I just checked myTech II cloneagainst my 2006 C6. In the ABSsectionthere is an "Automated Bleed†option. In the Radiosectionthere is a "VIN Relearn†option. I’ve never actually used either one, but I bet they work.
The clones are literally running the same software as theTech II, so they have all the same functions. There are a few caveats: the standard clone power supply will cause the unit to reset if you run the starter motor, apparently, though this can be fixed. Also, operating while tethered to a PC involves a bunch of licensing hacks and other nonsense. But you only need to do that if you want to flash the ECU firmware.
The Tech II lets you see (and individually reset) all the DTCs from all the modules. It also has a bunch of special functions and bidirectional capabilities.
It’s great as a standalone diagnostics tool but it isn’t intended to modify ECU parameters like tuning software does. This is a tool for fixing the car, not modifying it.
Src:http://blog.obd2eshop.com/gm-tech2-automated-bleed-2006-c6-feedback/
Posted by: OBDexpress.co.uk at
01:41 AM
| No Comments
| Add Comment
Post contains 179 words, total size 3 kb.
I just checked myTech II
The clones are literally running the same software as theTech II, so they have all the same functions. There are a few caveats: the standard clone power supply will cause the unit to reset if you run the starter motor, apparently, though this can be fixed. Also, operating while tethered to a PC involves a bunch of licensing hacks and other nonsense. But you only need to do that if you want to flash the ECU firmware.
The Tech II lets you see (and individually reset) all the DTCs from all the modules. It also has a bunch of special functions and bidirectional capabilities.
It’s great as a standalone diagnostics tool but it isn’t intended to modify ECU parameters like tuning software does. This is a tool for fixing the car, not modifying it.
Src:http://blog.obd2eshop.com/gm-tech2-automated-bleed-2006-c6-feedback/
Posted by: OBDexpress.co.uk at
01:41 AM
| No Comments
| Add Comment
Post contains 180 words, total size 3 kb.
June 22, 2018
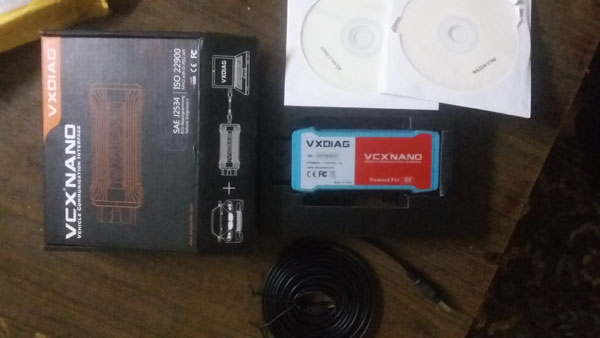
Free Download Ford/Mazda IDS software version 109 for VXdiag VCX Nano:
Ford IDS 109 download:
Mazda IDS 109 download:
No password!
100% tested byAllscanner
WorksperfectwithVXdiag VCX Nano Ford/Mazda
- Programming & Installation of new ECUs……….worked!
(PCM, ABS, Instrument Cluster, Air Bag, Fuel Pumps, etc.)……….worked! - Live Data-stream with Recording & Playback Functions for main ECUs……….worked!
- Read & Clear Diagnostic Trouble Codes (DTCs)……….worked!
- Set, Adjust or Remove Speed Governors……….worked!
- Automatic vehicle recognition……….worked!
- New Software Re-flash for Existing ECUs……….worked!
- All Other Dealer Functions……….worked!
- Steering Angle Resets………………….worked!
- Guided Fault Finding………………….worked!
- Program New Keys………………worked!
- DPF Regeneration………………worked!
- Brake Bleeding………………………………..worked!
- Injector Coding……………………………………..worked!
Src:
http://blog.obdexpress.co.uk/2018/06/22/ford-mazda-ids-109-download-100-tested/
Posted by: OBDexpress.co.uk at
06:27 AM
| No Comments
| Add Comment
Post contains 108 words, total size 10 kb.
June 21, 2018
For
How to do
1
That is, the data are directly downloaded from the PC to the ECU in the vehicle.
Although theGM Tech 2is still
- Connect Tech 2 to the vehicle.
- Connect Tech 2 to the PC switch on Tech 2.
- Start TIS 2000 on the PC.
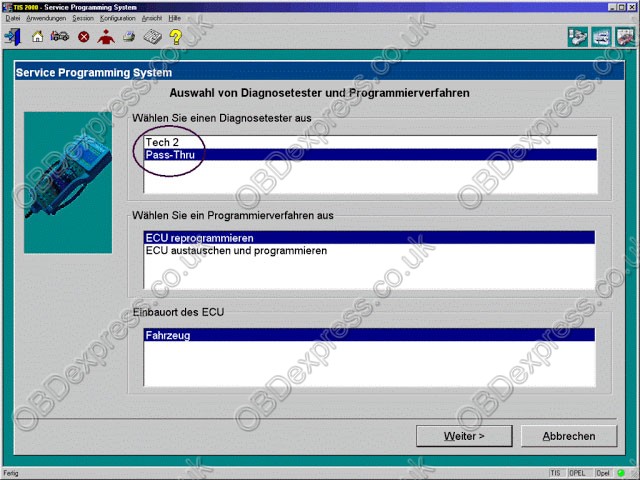
- Select the icon ‘Service Programming System’ (Fig. 1) on theTIS2000start page.
- Start TIS 2000 on the PC.
- On the screen ‘Select Diagnostic Tool and Programming Process’ (See picture below) make a selection for
***Pass-Thru mode
***the reprogramming of an ECU that was not exchanged or the replacement/programming of a new ECU
***the ECU location.
Thenclock‘Next’ button.
2
You connect the Tech 2 to the vehicle and download the module information that you want to program. Then you disconnect, run to the computer running Tis2000, connect it to the computer and download the programming information for that module, disconnect again and run back to the vehicle, connect it and it automatically programs the module. It can take a long time depending on the module (PCM is the longest).
Have fun in GM Tech II programming!
Good luck!
Src:
http://blog.obd2eshop.com/gm-tech2-scan-tool-pass-through-vs-go-between/
Posted by: OBDexpress.co.uk at
08:55 AM
| No Comments
| Add Comment
Post contains 312 words, total size 7 kb.
June 20, 2018
KTMflash programming
Read ECU password of VAG TPROT8+: Success!
Here you go
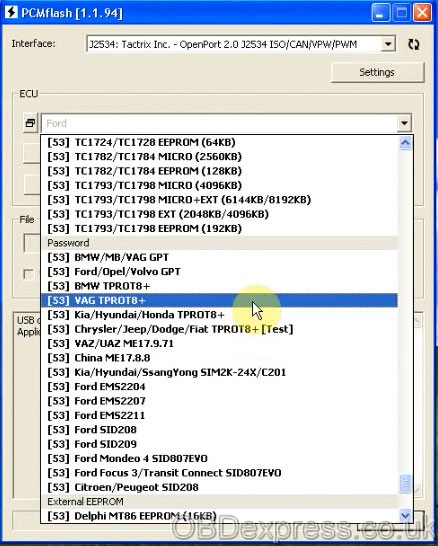
Interface: Tractrix Inc. - OpenPort 2.0 J2534 ISO/CAN/VPW/PWM
Language: Auto
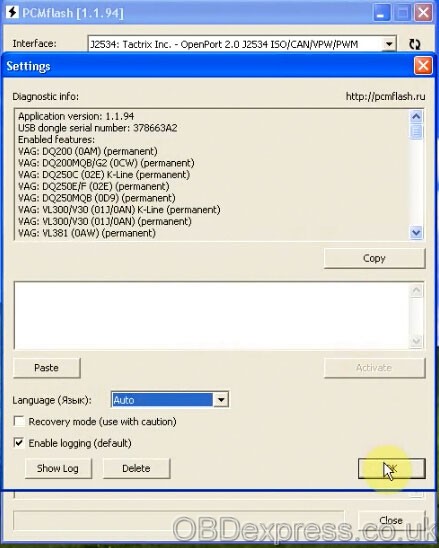
Select an ECU

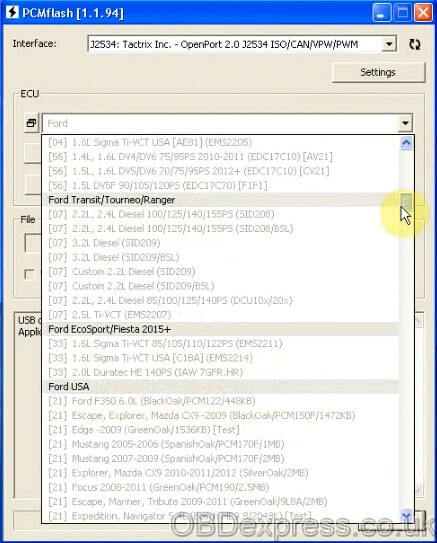

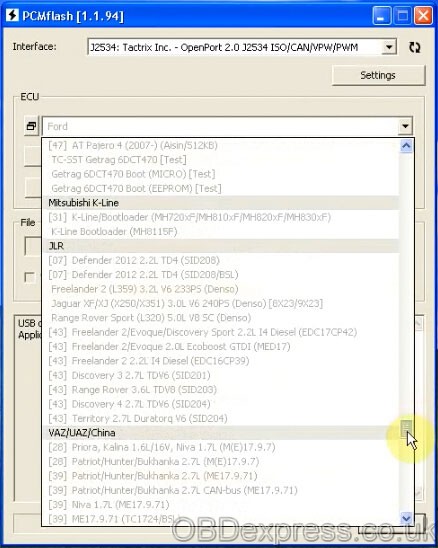
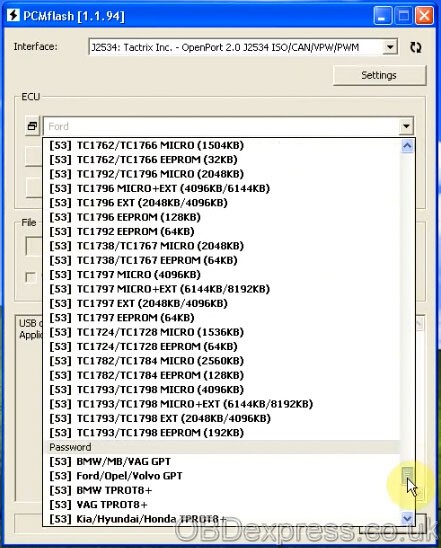
Here: VAG TPROT8+
To check KTMflash ECU List, please go to
http://www.obdexpress.co.uk/wholesale/ktm-flash-
Then read ECU data/password

You need an OBD 16pin female connector to KTMflash
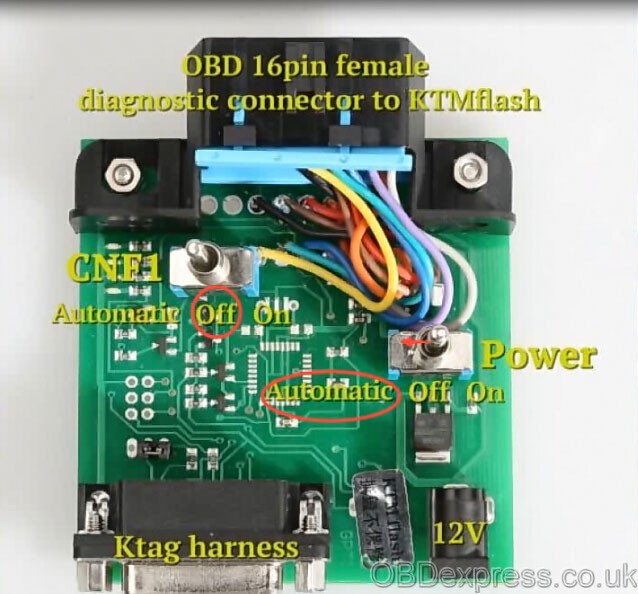
The connection of KTMflash programmer and ECU

Use automatic power control (K-line)

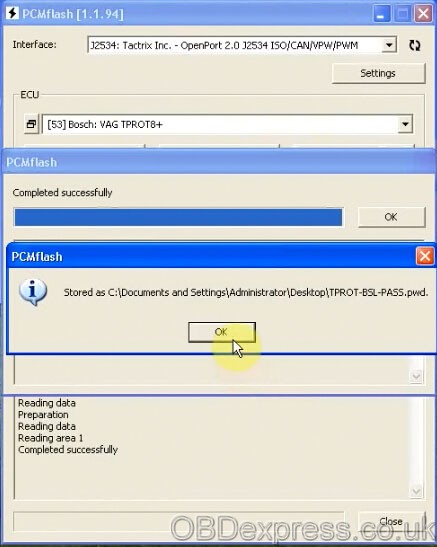
Reading data

Successfully read data of VAG TPROT8+
Save data
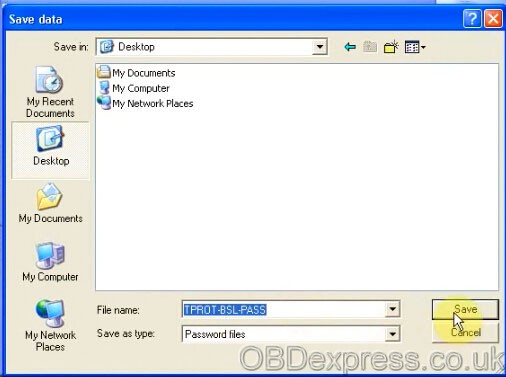

Job’s done!
Tech support fromobdexpress.co.uk
Src:
http://blog.obdexpress.co.uk/2018/06/20/how-to-read-vag-tprot8-with-ktmflash-ecu/
Posted by: OBDexpress.co.uk at
07:54 AM
| No Comments
| Add Comment
Post contains 93 words, total size 12 kb.
KTMflash programming tooltest report:
Read ECU password of VAG TPROT8+: Success!
Here you go
Interface: Tractrix Inc. - OpenPort 2.0 J2534 ISO/CAN/VPW/PWM
Language: Auto
Select an ECU
Here: VAG TPROT8+
To check KTMflash ECU List, please go to
http://www.obdexpress.co.uk/wholesale/ktm-flash-ecu-programmer-transmission.html
Then read ECU data/password
You need an OBD 16pin female connector to KTMflash
The connection of KTMflash programmer and ECU
Use automatic power control (K-line)
Reading data
Successfully read data of VAG TPROT8+
Save data
Job’s done!
Tech support fromobdexpress.co.uk
Src:
http://blog.obdexpress.co.uk/2018/06/20/how-to-read-vag-tprot8-with-ktmflash-ecu/
Posted by: OBDexpress.co.uk at
07:54 AM
| No Comments
| Add Comment
Post contains 91 words, total size 12 kb.
June 19, 2018
Confirmed!Xhorse tools VVDI PROG+VVDI MBare able to program new keys to 2002 E230 with EZS W210 when all keys are lost.
In detail...
Purpose:Read with VVDI PROG and createkeywith VVDI MB
Car:Working on a 2002 E320 pulled theezsand says it w210
Keys:All keys are lost
Tools:I have VVDI PROG with MB adapters and VVDI MB tool.
Suggestion:
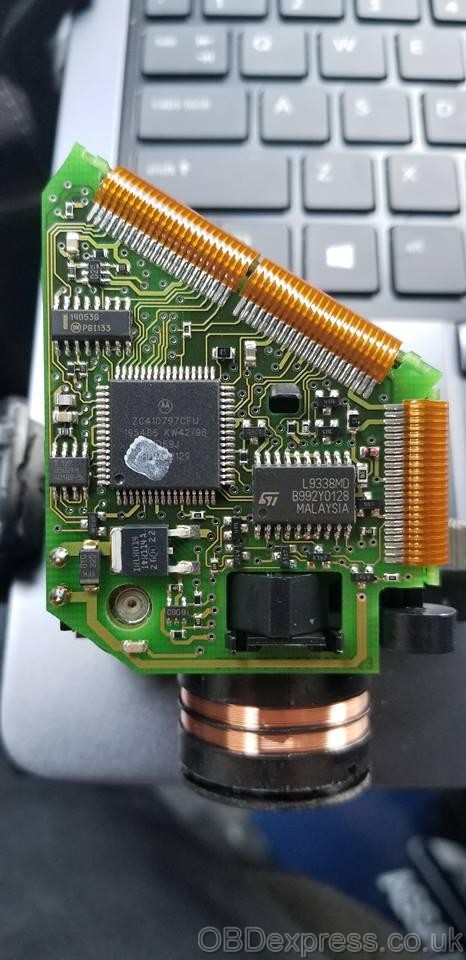
You need to desolder 64 legs MCU chip and read byOrange5orAK500
If you neverdonesomething like thisbringsomejunk yardEZS and practice at home
You really don’t want to practice oncustomerscar
How to with Xhorse tools:
Vvdimbfor w210 direct not possible, read with VVDI PROG then rest VVDI MB
1D69J:
Src:
http://blog.obdexpress.co.uk/2018/06/19/2002-e230-w210-all-keys-lost-vvdi-prog-vvdi-mb-done/
Posted by: OBDexpress.co.uk at
02:59 AM
| No Comments
| Add Comment
Post contains 118 words, total size 3 kb.
June 16, 2018
FYI, we’re sorry to tell you guys, the best qualityVCM2 SP177-C1is very hot and sometimes out of stock at obdexpress.co.uk. BUTno worries! We haveVCM2 SP177-2, produced from the same factory as SP177-C1, so the quality is guaranteed.
PCBs talk...you’ll know if VCMII SP177-2 good or not?
Look at the images of VCM2 inner parts


vcm 2 sp177-c1 pcb:http://blog.obdexpress.co.uk/2018/01/21/vcm-2-best-quality-sp177-c1/
Posted by: OBDexpress.co.uk at
08:44 AM
| No Comments
| Add Comment
Post contains 64 words, total size 12 kb.
FYI, we’re sorry to tell you guys, the best qualityVCM2 SP177-C1is very hot and sometimes out of stock at obdexpress.co.uk. BUTno worries! We haveVCM2 SP177-2, produced from the same factory as SP177-C1, so the quality is guaranteed.
PCBs talk...you’ll know if VCMII SP177-2 good or not?
Look at the images of VCM2 inner parts
vcm 2 sp177-c1 pcb:http://blog.obdexpress.co.uk/2018/01/21/vcm-2-best-quality-sp177-c1/
Posted by: OBDexpress.co.uk at
08:44 AM
| No Comments
| Add Comment
Post contains 64 words, total size 12 kb.
32 queries taking 0.1068 seconds, 149 records returned.
Powered by Minx 1.1.6c-pink.

