


March 31, 2020
Car model: 2014 Benz 906.155
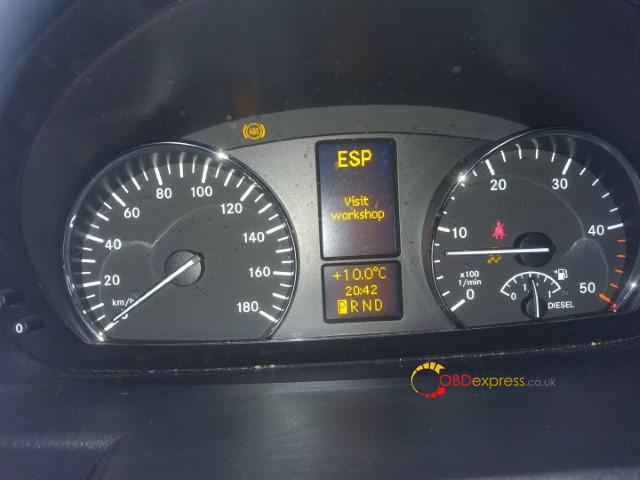
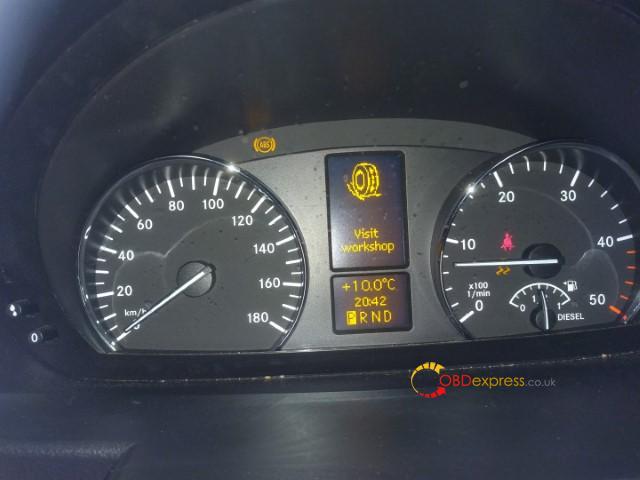
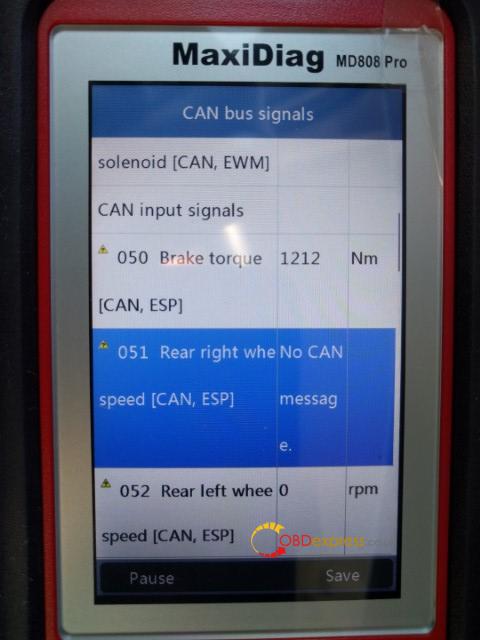
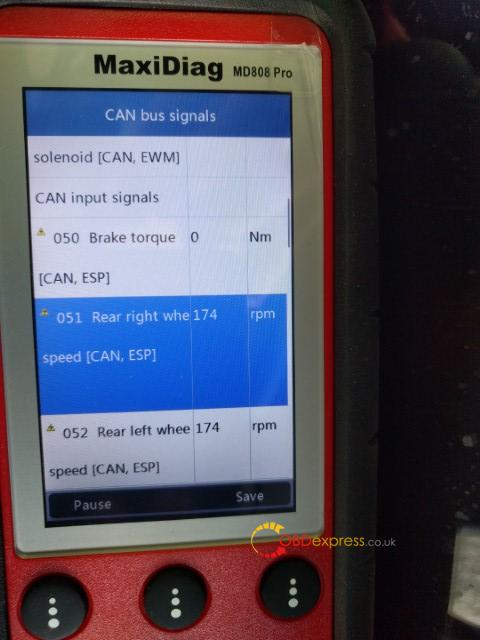
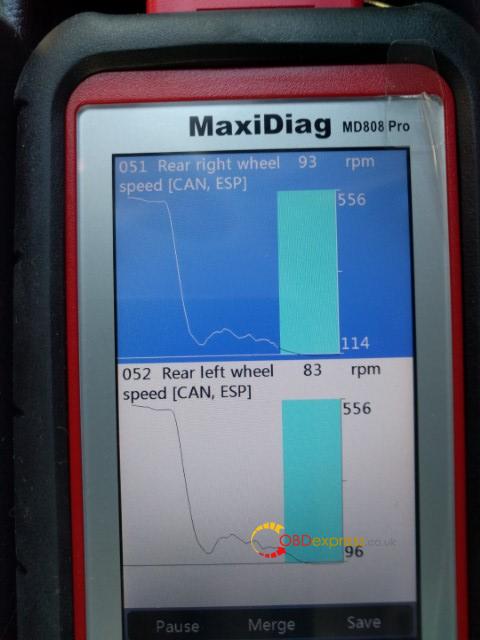
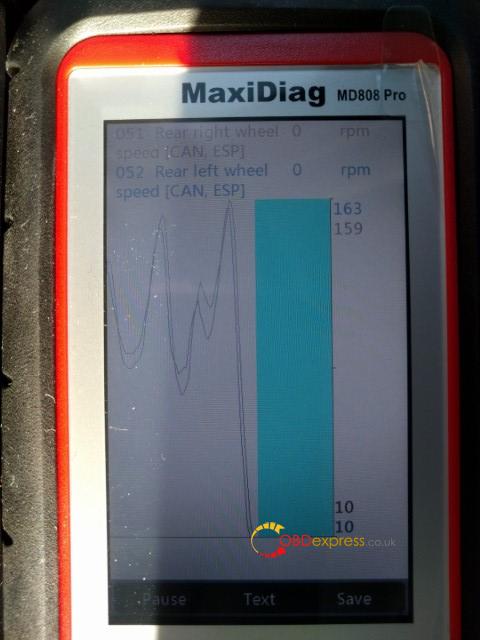
Symptom: Dash lit up with ABS, ESP, and traction warnings
Showing intermittent inability to get wheel speed from right rear wheel speed sensor. Looks like DTC is D40C.
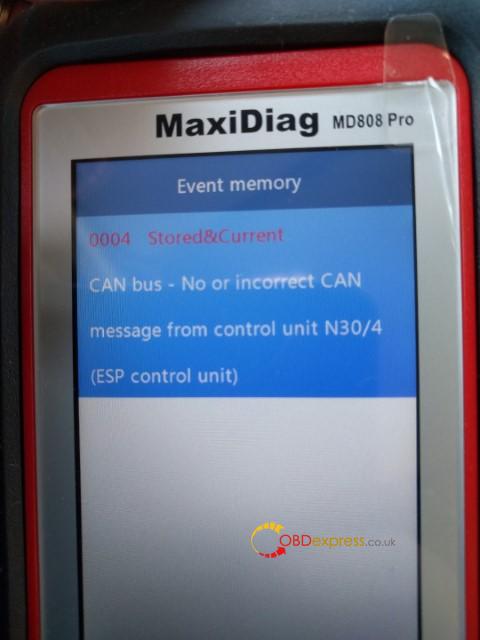
Code scanner to use: Autel Maxidiag MD808 PRO
Test reports:
So far the MD808P has been very helpful.
Some specific notes:
- Creating an account on Autel, registering the scanner, and downloading scan updates were all incredibly easy.
- The unit uses a standard micro-sd, which can be removed and updated seperate from the unit
- Alternately, the unit can be updated via a USB cable.
- Power is supplied via either the USB or OBD cable, there are not batteries.
- Feel is generally good. Lighter than I expected, but quite reasonable.
- The screen is non-touch, but is clear, and easy to read.
- Currently only covers pre 2016 sprinters.
Warning ABS:

Warning ESP:
Warning Misc:
DTC D40C:
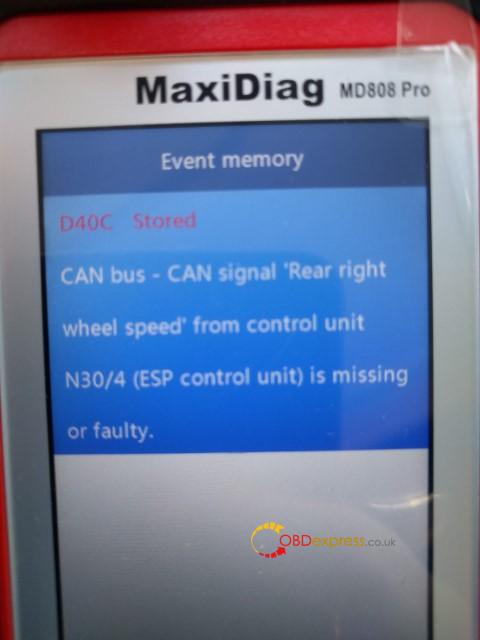
get wheel speed from right rear wheel speed sensor, DTC is D40C:
Autel MD808 Pro Sprinter Coverage:

Newest Sprinter coverage + the other coverage:

https://www.autel.com/vehicle-coverage/coverage2
Enjoy!
Posted by: OBDexpress.co.uk at
05:49 AM
| No Comments
| Add Comment
Post contains 184 words, total size 7 kb.
March 25, 2020
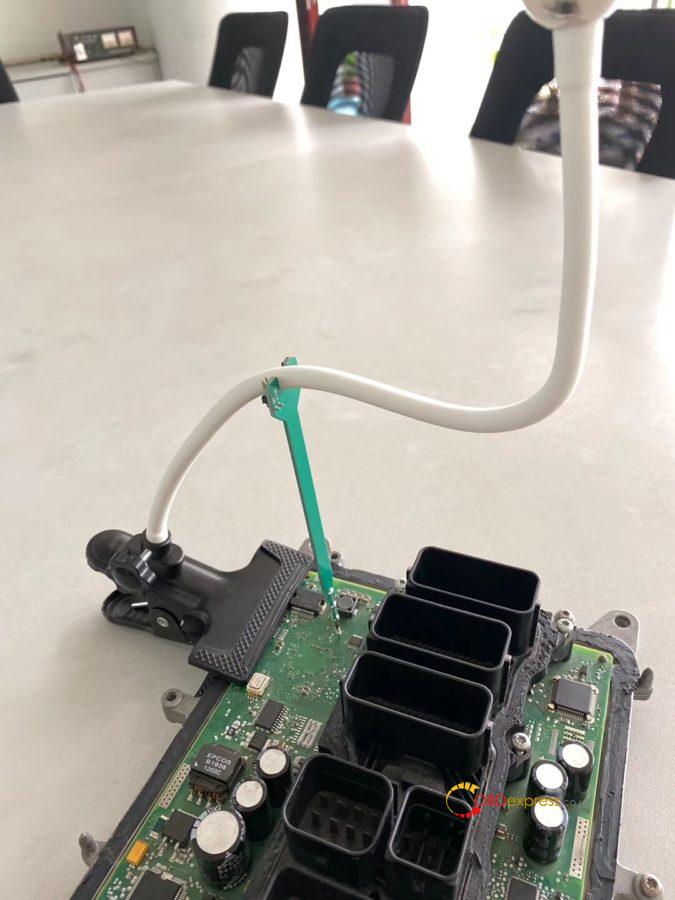
How connect Single Probe Solderless Connector with the ECU?
1.video demo:
https://youtu.be/nTsf7xiQe2A
2.Step-by-step:
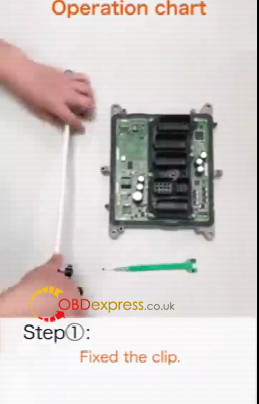
Step 1. Fix the chip.
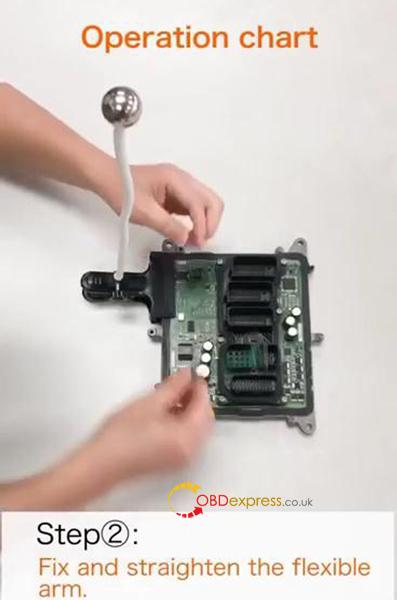
Step 2. Fix and straighten the flexible arm.
Step 3. Align and prick the probe at the test point.
Use the PCB probe board to align the through -hole test point or solder pad test point.

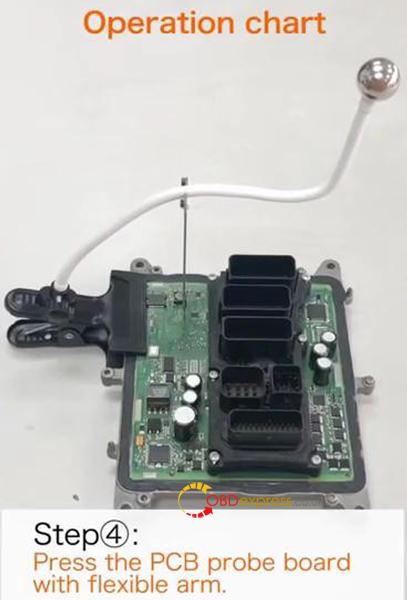
Step 4. Press the PCB probe board with flexible arm.
Note that the angle between the flexible arm and the PCB probe board should be kept at 90°.
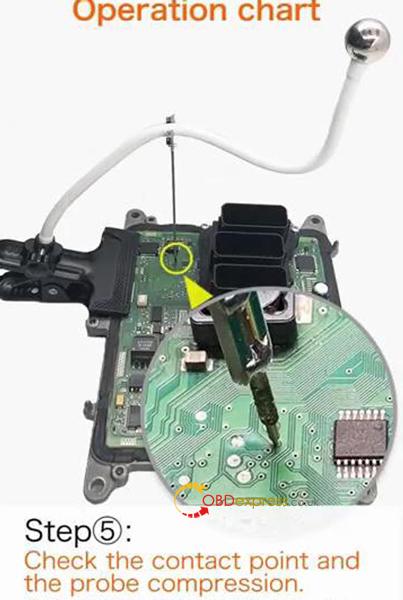
Step 5. Check the contact point and the probe compression.
Adjust the inclination of flexible arm according to the length of the probe compression.
Single Probe Solderless Connector.
No soldering, No risk!
What it can do:
- Provide solderless connecting during in-circuit programming (ICP) testing.
- Connect the Boot point when opening DME shell to read ISN code.
Compatible devices:
Yanhua Mini ACDP: tested
The other devices: Yes

(Image: How connecting with manhua ACDP)
3 Pros of single probe solderless connector:
- Excellent versatility: compared with the traditional ECU worktable, it is compact in size, easy to carry, has multiple fixing modes, more suitable for outdoor or indoor work.
- Simple and high efficiency operation: the connection can be simply completed by pulling and pressing.
- Modular design: free switch among single point connection, multi-point connection and combination connection.
Yanhua Single Probe Solderless Connector best price offers here:
http://www.obdexpress.co.uk/wholesale/yanhua-singe-probe-solderless-connector.html

Posted by: OBDexpress.co.uk at
10:07 AM
| No Comments
| Add Comment
Post contains 233 words, total size 5 kb.
March 23, 2020
Car model and year:
2002 - 2005 Porsche 996 that had the OBC but not cruise control.
Pre 2002 the wiring is very different t…it needs to be fed to the DME in the rear of the car rather than the instrument cluster (It’s MY2001 onwards I believe).
Time to use:
From start to finish it took me around 3 hours.
This included reading my instructions, re-reading my instructions, taking pictures and taking my time. I also haven’t factored in the time for coding the DME once the work has been completed.
The list below is a high level grouping of what I did, and the order I did it.
- Find and buy all the parts…know exactly what you’re doing with each
- Remove the instrument cluster
- Remove the steering wheel
- Remove the old stalk unit
- Clean the now-visible parts of the dashboard (you find a lot of dust and dirt)
- Put together the wiring
- Fit the new stalk unit
- Wire up the new stalk unit to the instrument cluster
- Re-fit the steering wheel
- Re-fit the instrument cluster
- Connecting the new stalk unit to the fuse-box
- Coding the DME
Step 1 – What you’ll need to buy
All parts and prices were correct as of September 2016 and were purchased from OPC Bournemouth and Breeze VW Poole.
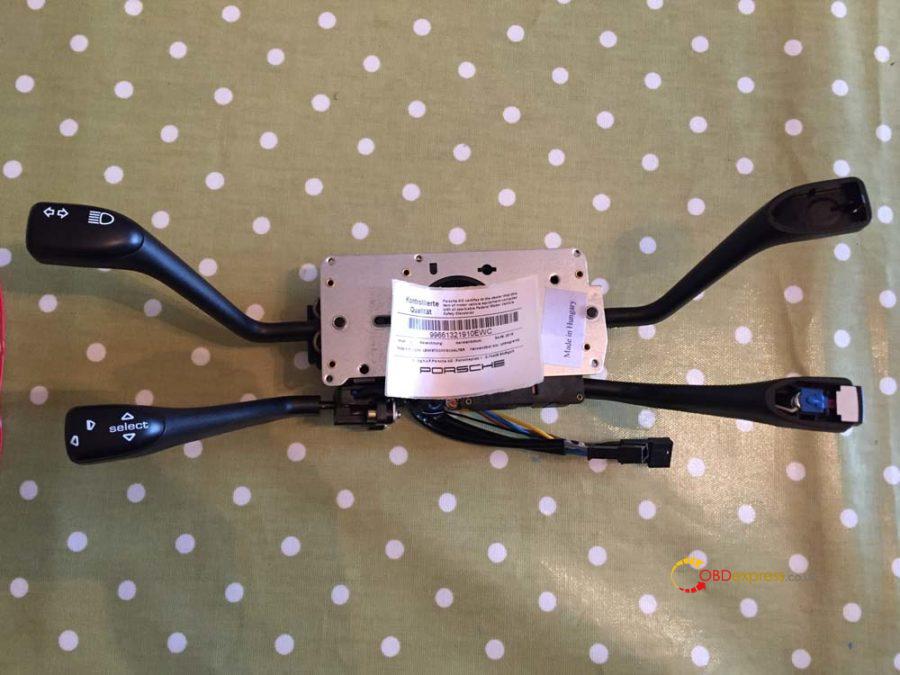
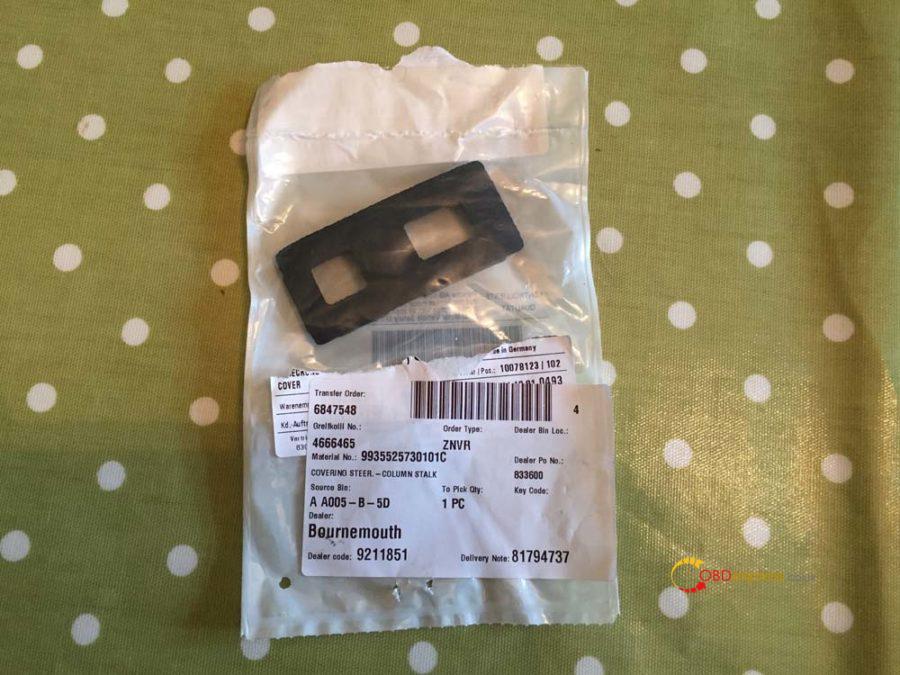
Part Name: 4-Stalk cluster (Indicators, Wipers, OBC, Cruise)
Part Number: 996-613-219-10 EWC
Quantity: 1
Price: £202 (£168.97 + VAT)
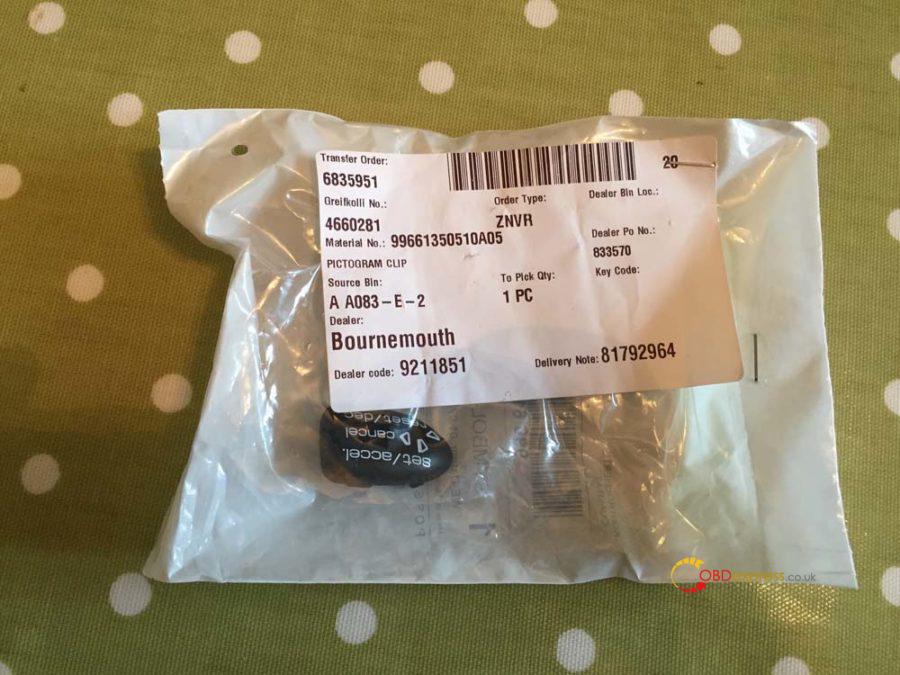
Part Name: Cruise control cap for stalk cluster
Part Number: 9
Quantity: 1
Price: £4.70
Part Name: Wiper/Cruise stalk cluster grommet
Part Number: 9
Quantity: 1
Price: £9.97
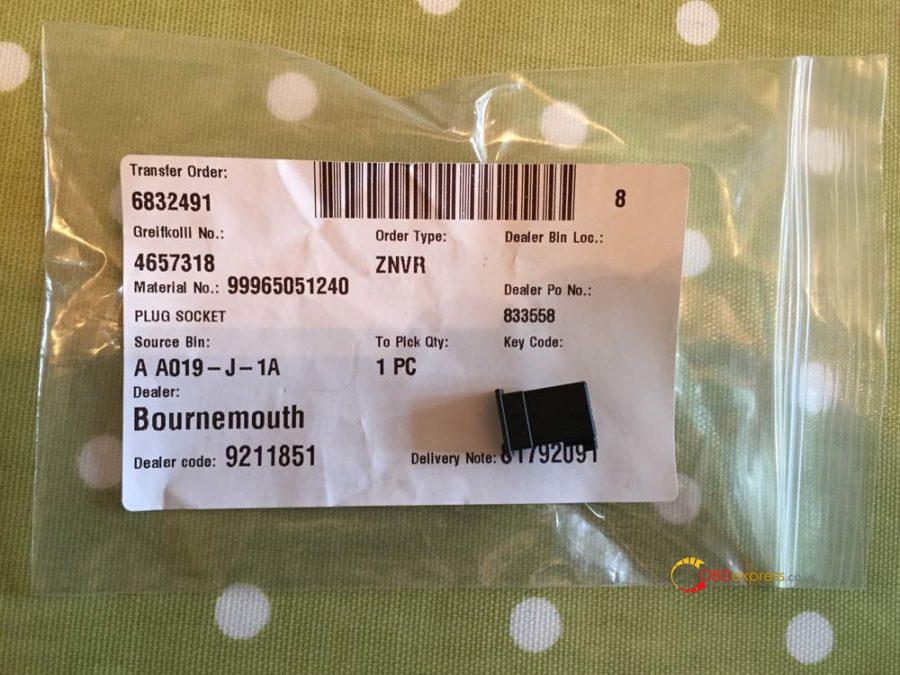
Part Name: Cruise stalk cluster wiring connector
Part Number: 999-650-512-40
Quantity: 1
Price: £0.07p
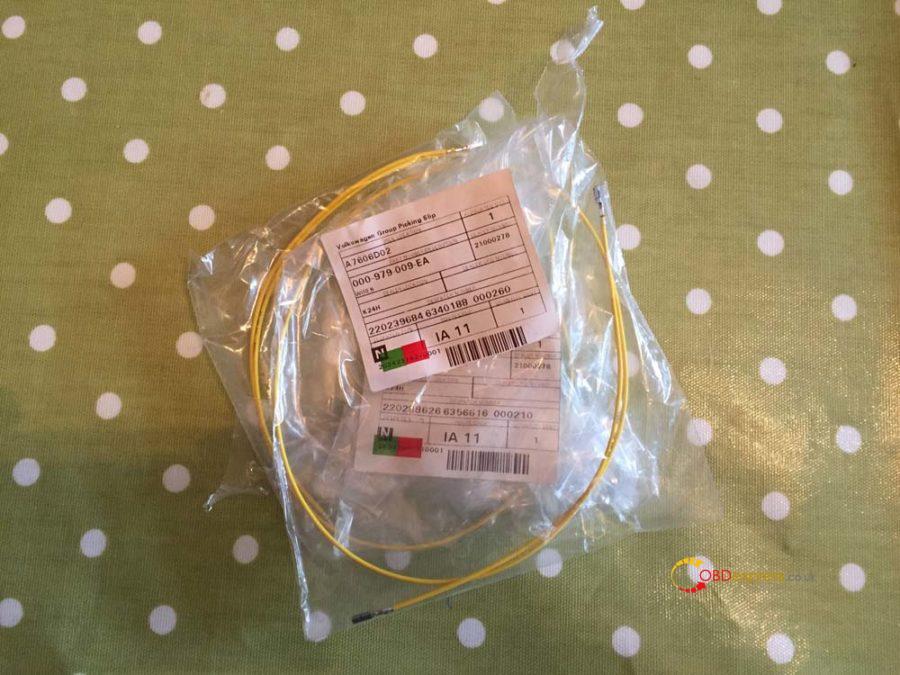
Part Name: VW repair wires (Yup from VW)
Part Number: 000-979-009 EA
Quantity: 4
Price: £20.16 (£5.04 each)
Part Name: 22-gauge wire
Quantity: 1m
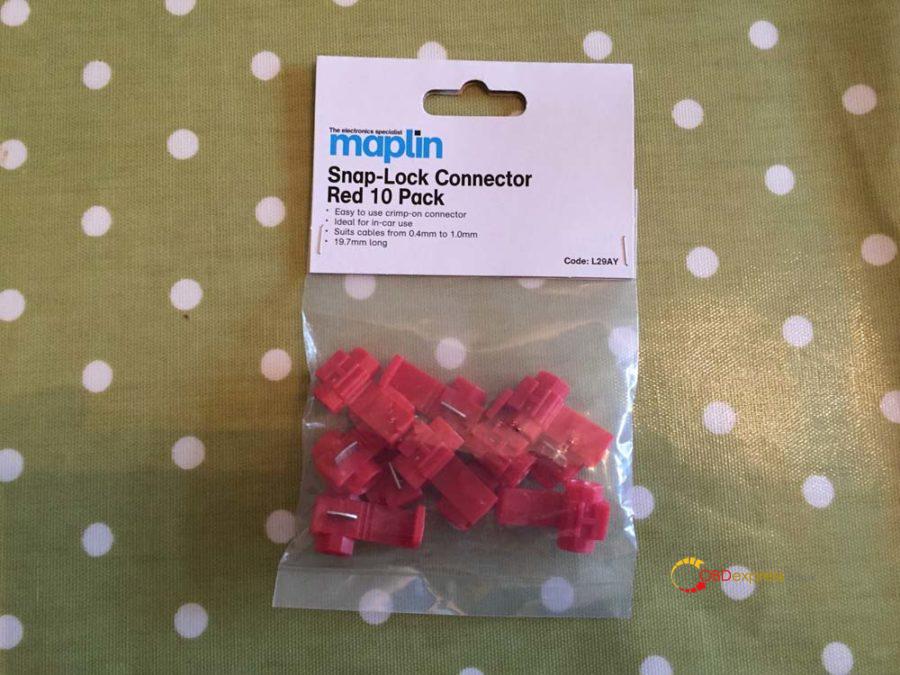
Part Name: Snap-Lock connectors
Quantity: 2
Price: £2.39 for 10 from Maplin
DME coding by OPC: £66
Total price for the project: £305.29 (£239.29 if you can do the coding yourself)
You’ll need to have the following tools:
- 24mm socket
- T30 torx
- T20 torx
- T10 torx
- Philips screwdriver
- Blunt knife
- Wire cutters
[So here’s the picture of all the part’s (excluding the 1m wire)
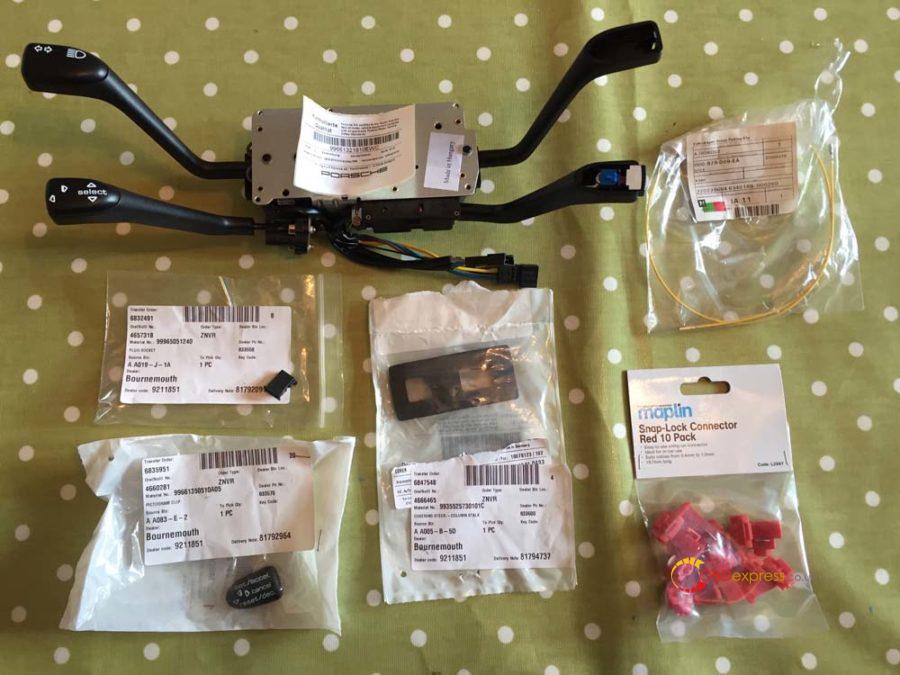
And here’s a close up of each part:
The 4-Stalk cluster (Indicators, Wipers, OBC, Cruise). You’ll notice it doesn’t come with the cruise cap or the wiper cap so you can transfer the wiper crap from your old stalk cluster.
Cruise control cap for stalk cluster.
Wiper/Cruise stalk cluster grommet. If you don’t want to buy the grommet, when you take the old one out you’ll see there is a square mark you can cut along…saves a few quid.
Cruise stalk cluster wiring connector.
VW repair wires – They will generally have these in stock as they’re a fairly common part.
Snap-Lock connectors from Maplin.
Step 2 – Removal of the Instrument Cluster
Before you begin make sure you disconnect the battery and leave it at least 15-20 min to ensure the airbag’s have completely disengaged. Put the key in the ignition and turn it all the way but do not start the engine, then disconnect the battery. This will prevent the alarm from sounding. Leave the key in the ignition until you have finished and are ready to re-connect the battery. It’s also worth mentioning and may seem like common sense but leave the frunk open otherwise you lock yourself out of the battery and it’s a faff to get back in.
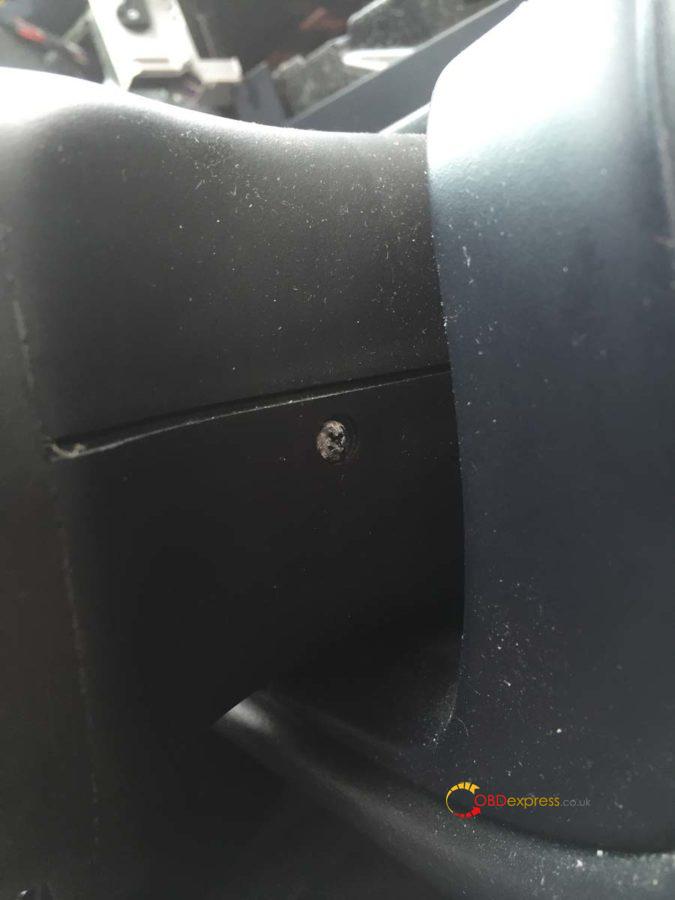
To remove the instrument cluster there are two torx screws you need to undo. One is behind the microphone on the right and the other is behind the hazard light on the left.
If you use a blunt knife (with a microfiber cloth under so you don’t damage the dash) you should be able to lift the microphone out and you’ll see the screw at the back. Don’t worry if the screw falls, there is enough stuff to stop it disappearing into the cluster. I believe these screws were the T20 torx screws.
Push the hazard light button in so it pops out and you can then pull the button out of its housing. Then you should be able to remove the button surround, there are two clips inside the surround you need to push in when pulling it out.
Once you’ve removed the hazard light and surround you’ll see the torx screw in the bottom left corner:
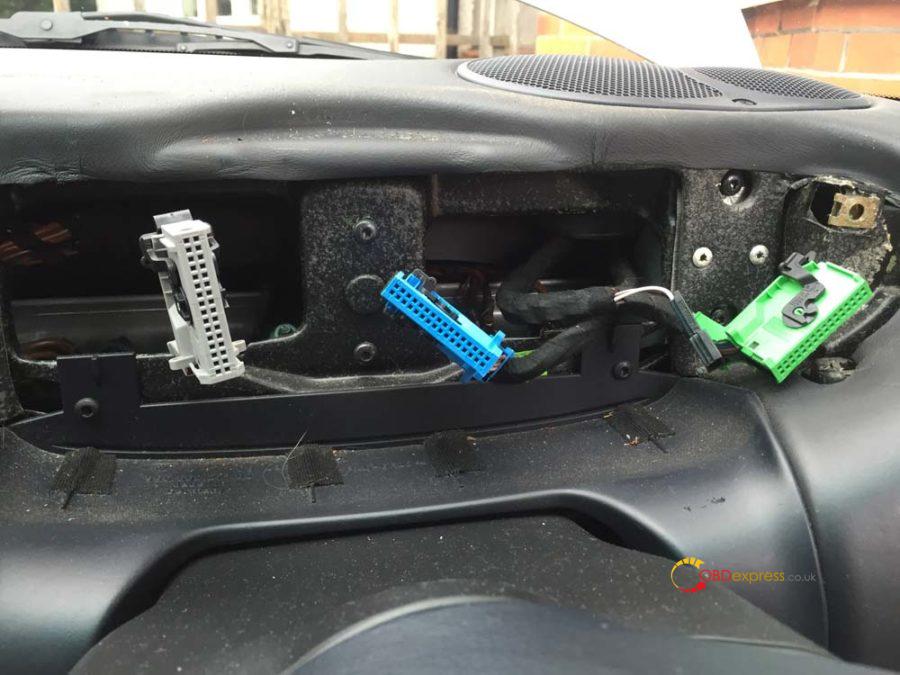
Once you’ve undone the two screws just lift the instrument cluster upwards. You may need to use a little force (not too much) and give it a slight wiggle. It’s also at this point you’ll find any missing parking tickets…I found a valet parking ticket for the Lanesborough hotel (from the cars previous owner unfortunately).
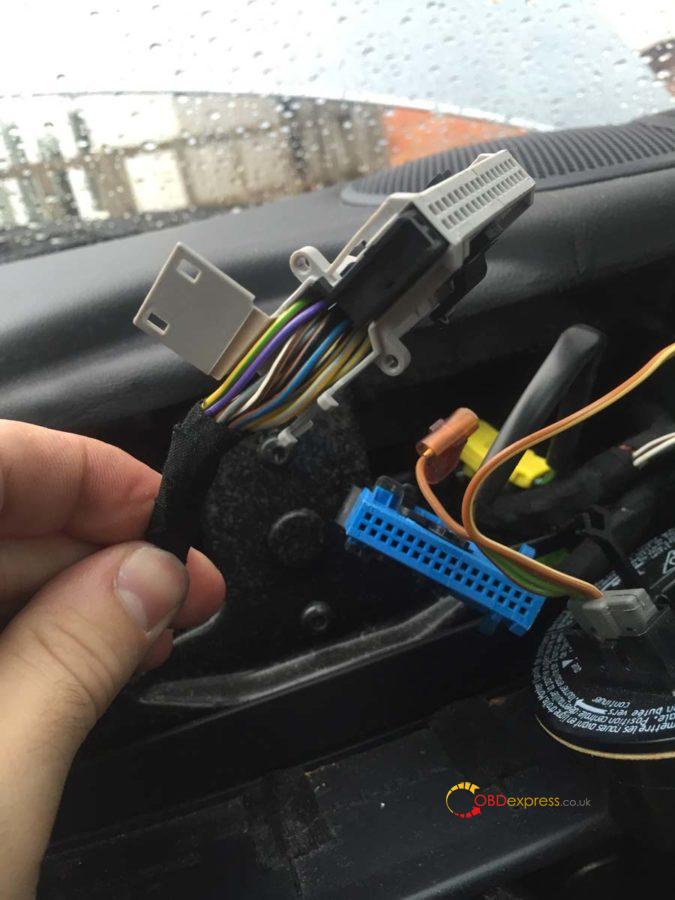
Once it’s free you’ll find 3 coloured plugs in the back, green, blue and gray. You’ll also find a connection for the hazard switch and the microphone. You only need to unplug the green, blue and gray connectors as well as the microphone…leave the hazard plug in.
Here you can see the green and blue cables and in-between them the microphone connector.

These disconnect by pushing in the clip in the middle and then sliding the black bar all the way to the top. Click the bar in place at the top and the connector will pop out.
Put some cloths or sheets across the dash and swivel the instrument cluster across and out of the way.
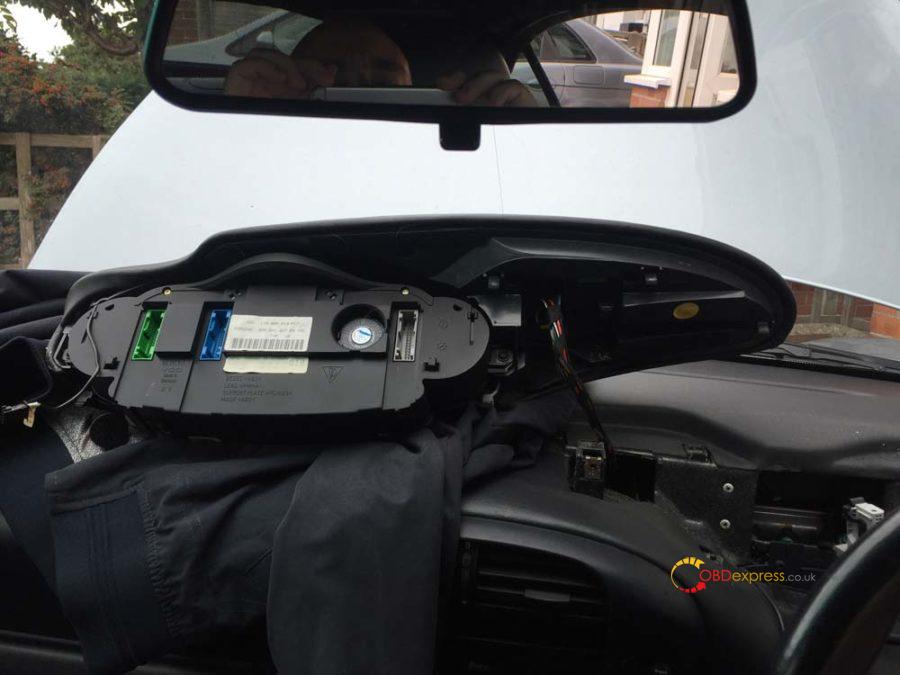
The gray connector is the only one we’ll be working with.
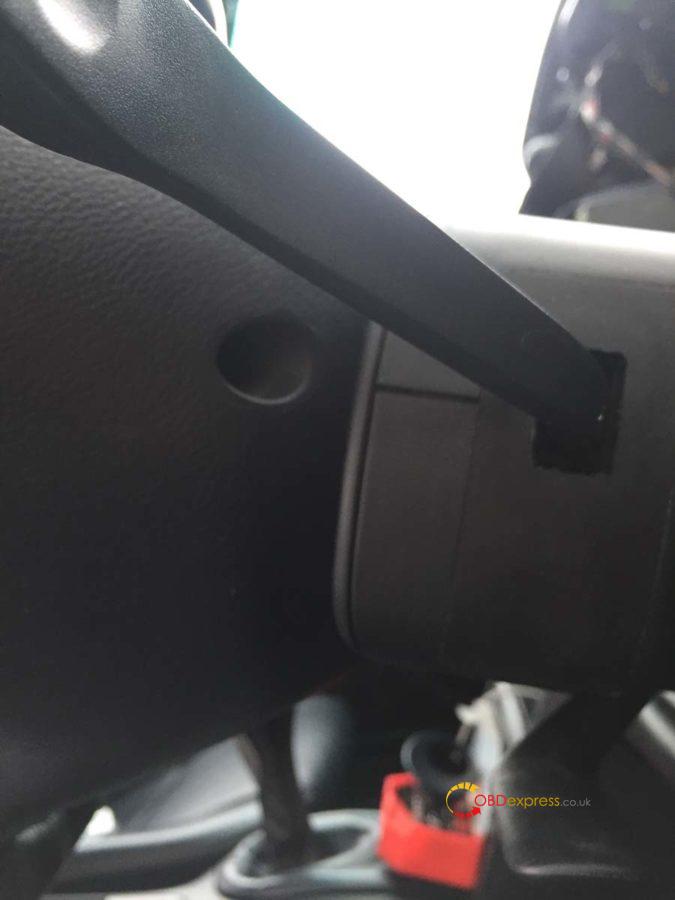
Step 3 – Removal of the steering wheel
We firstly need to remove the center piece of the steering wheel, the airbag and horn. On the back of the wheel just in front of the stalks you’ll find two holes with spring-loaded screws. These are T30 torx screws and when undone should not come out.

You should be able to lift the air bag out carefully. At this point I rested it on my knee and with the blunt knife carefully lifted the yellow connector out. Place the airbag unit to one side with the Porsche crest facing upwards.
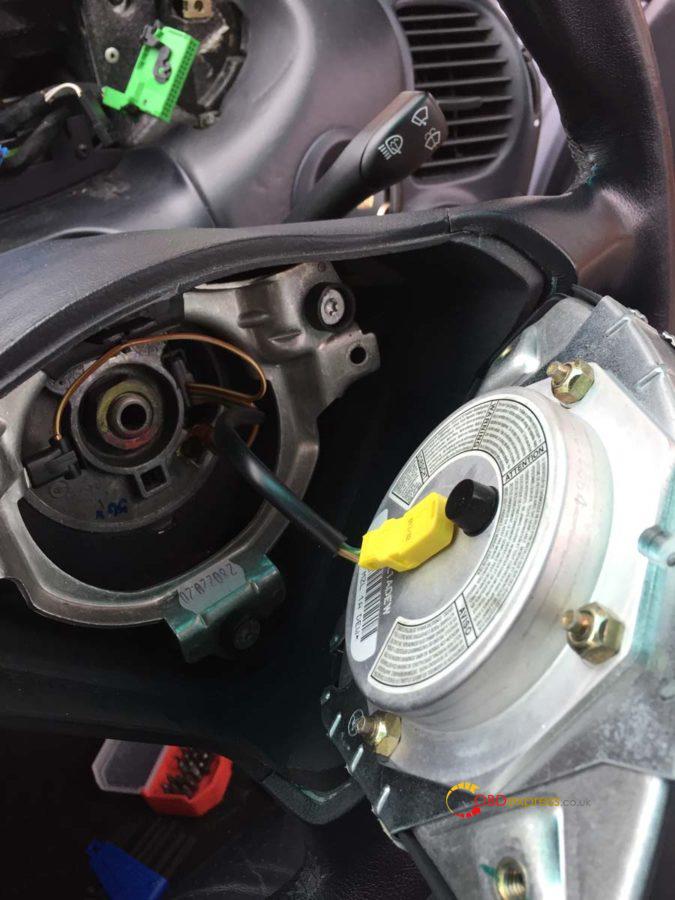
Disconnect the two spade connectors you’ll see on the next picture.
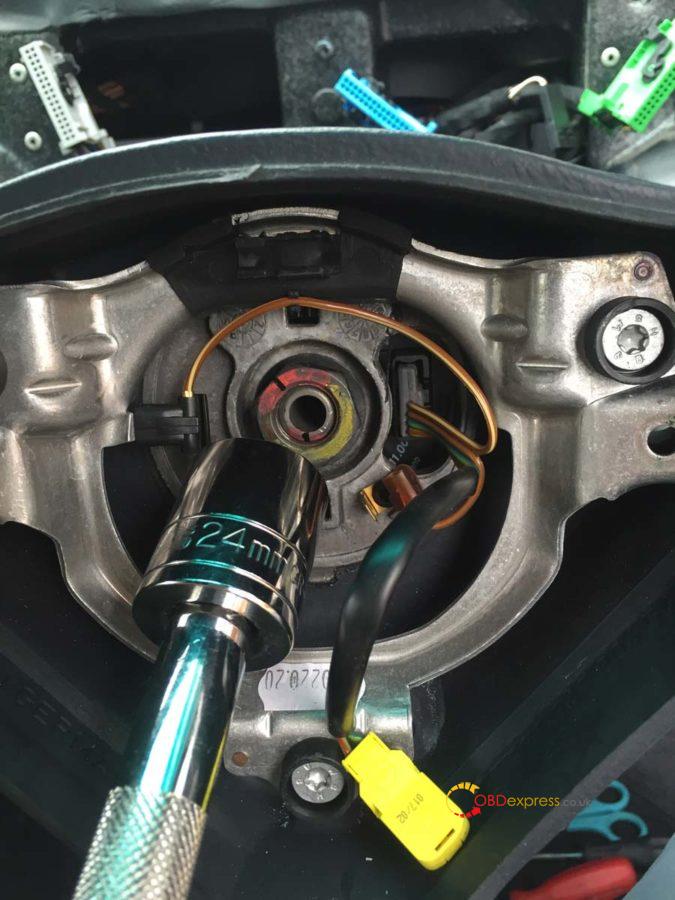
Draw a line with a marker pen down the center nut to mark its position. This is to make sure when you put it back together it goes back in the same place.

Using a 24mm socket undo the wheel nut. You will find the steering wheel wants to turn so carefully hold it in place with one hand whilst you undo it (You’ll notice at this point I hadn’t undone the two spade connectors).
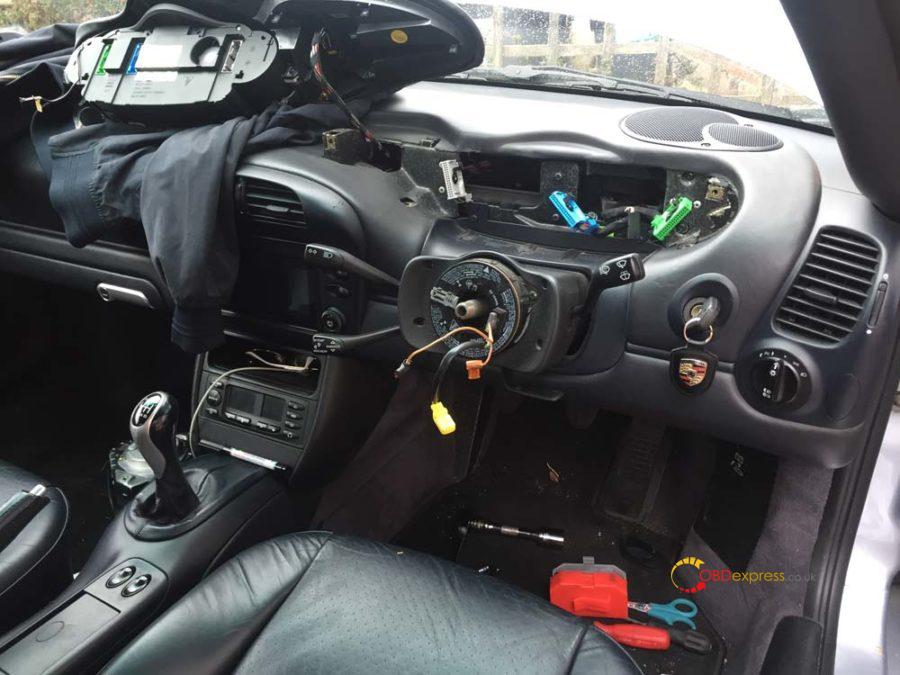
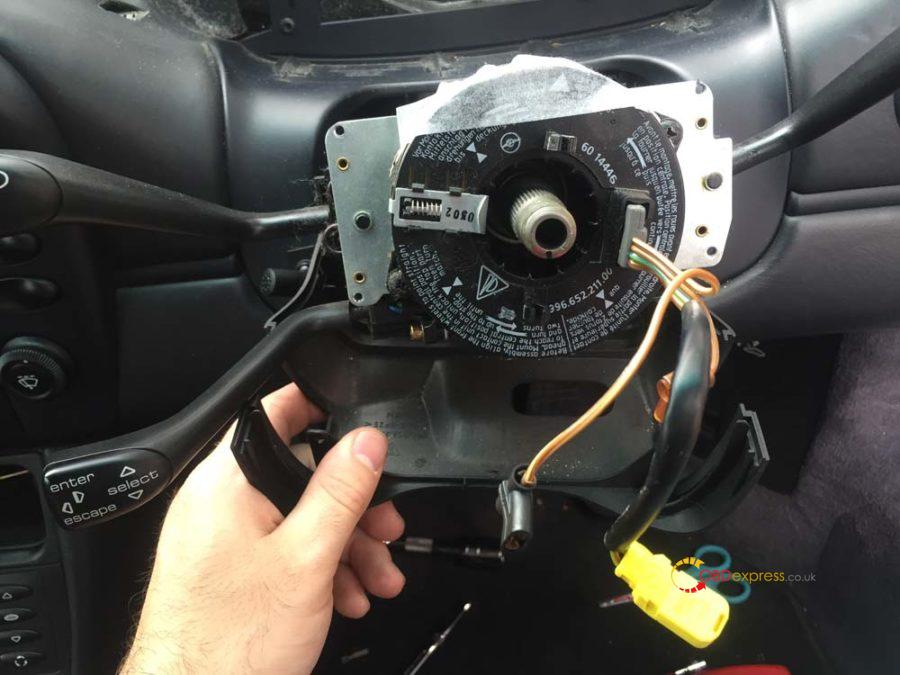
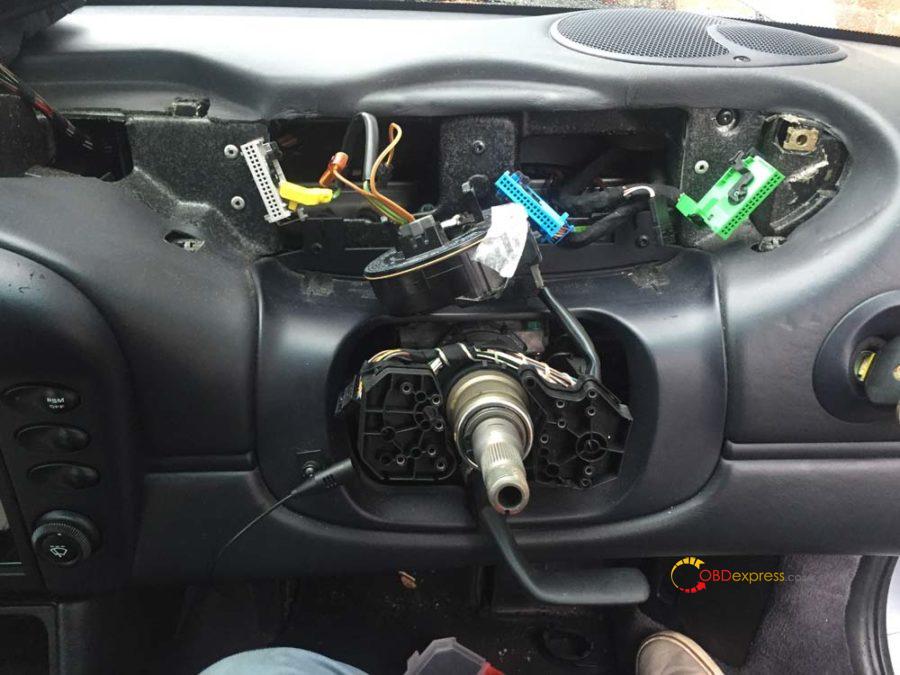
This should be the current state of your dash.
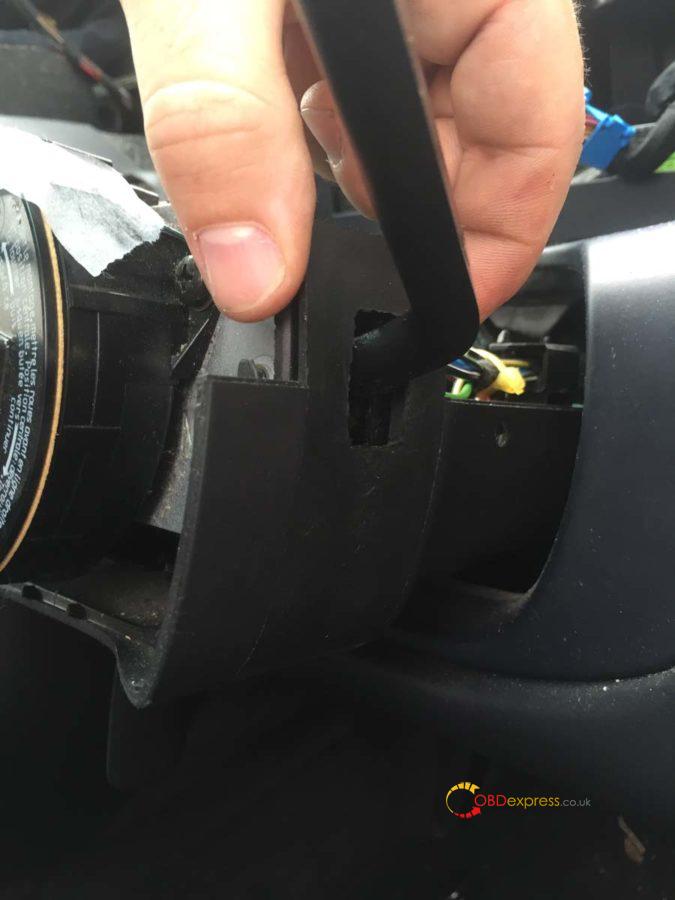
Tape the clock-spring connector unit to stop it moving around. Be careful of the two plastic prongs, if you snap these it’s an expensive part to replace. Undo the 4 screws and remove the faceplate. You can also undo the two screws securing the clock-spring connector unit at this point or wait until after removing the steering column panels.
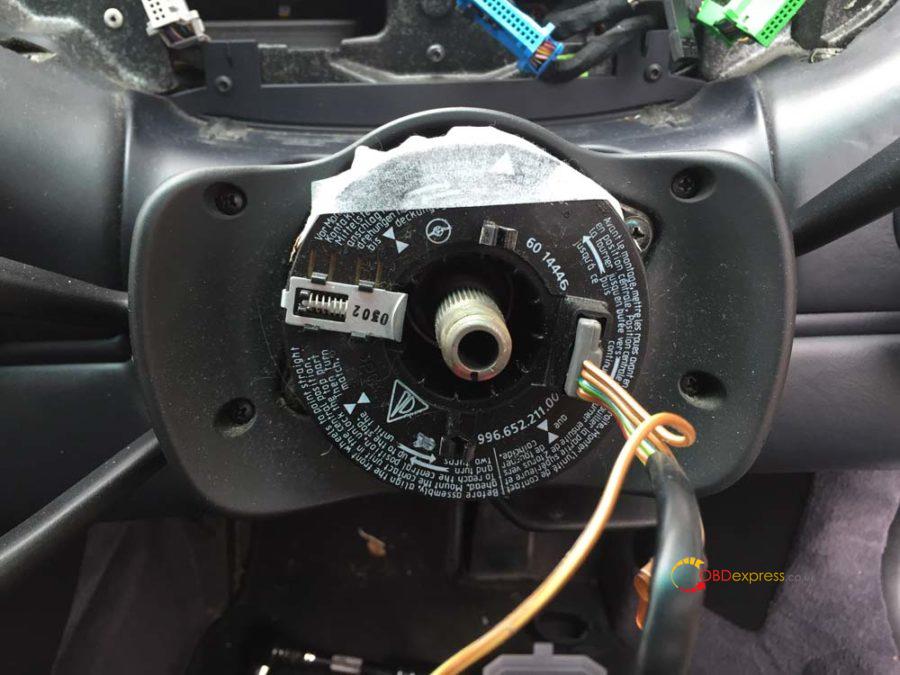
Here’s a helpful video for removal of the steering wheel to make some of that a bit clearer (it’s not my video).
https://youtu.be/hux78ZoPcAI
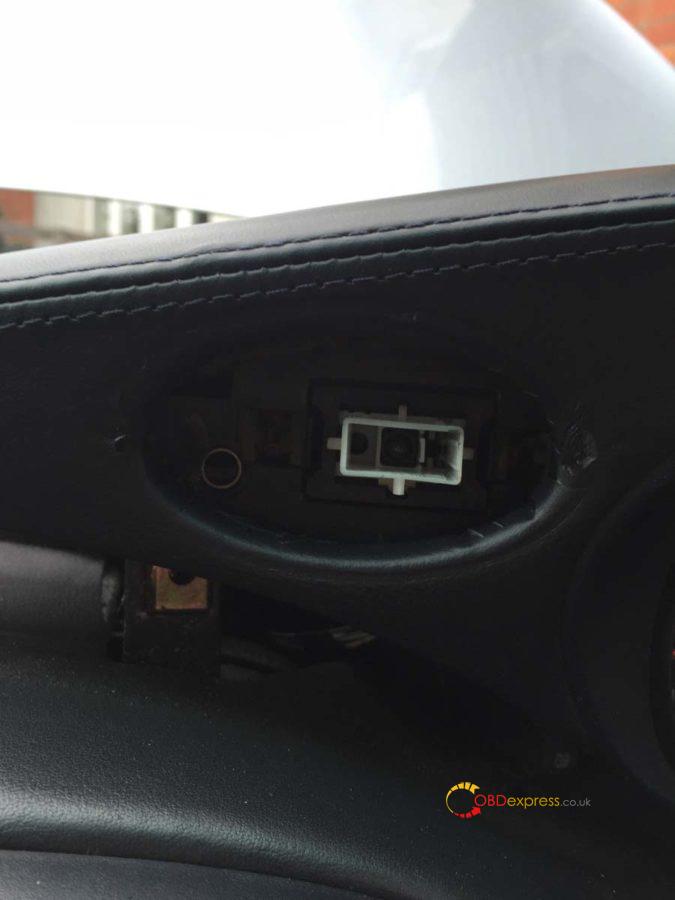
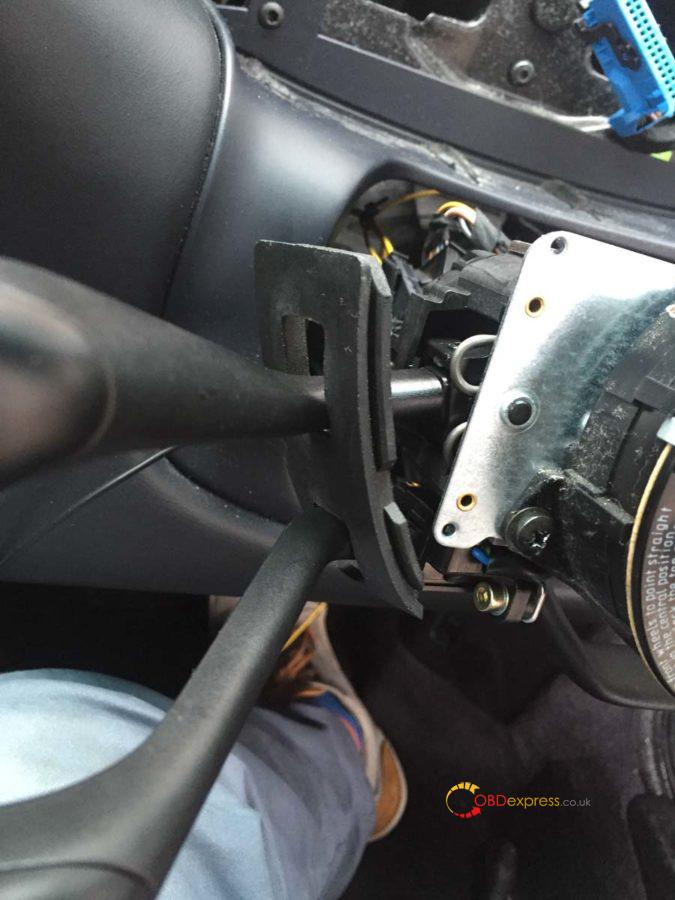
Step 4 – Removing the stalk cluster
Remove the two small T10 torx screws on either side of the steering column.
Lift the top away first and put it to one side.
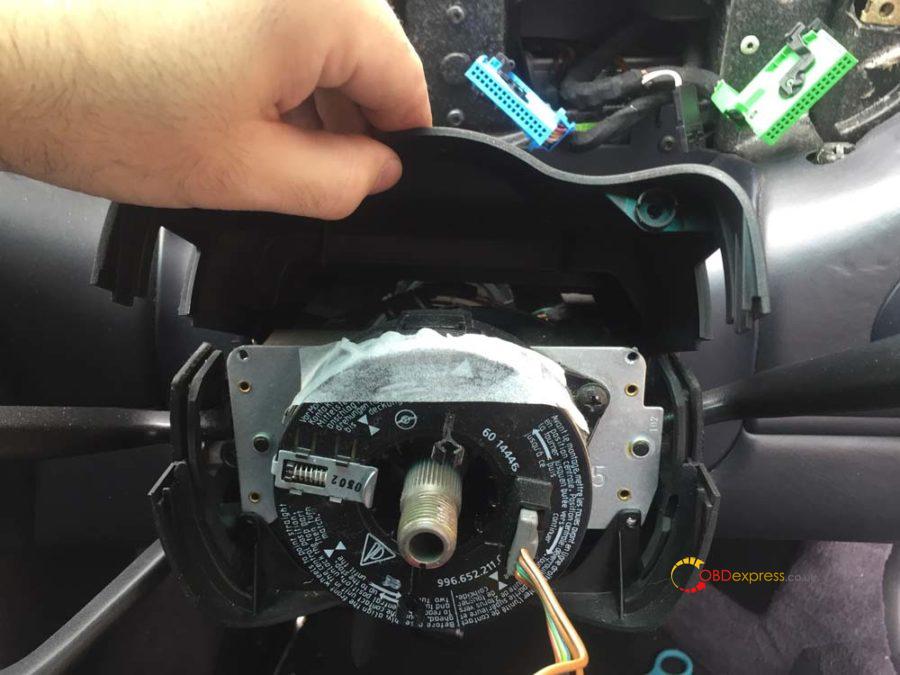
Now start to remove the rubber grommets that the indicator and wiper stalks feed through. You’ll more than likely need to move the indicator down and the OBC (if you have it) up to pull it off.
Once both grommets are off you can remove the lower panel.
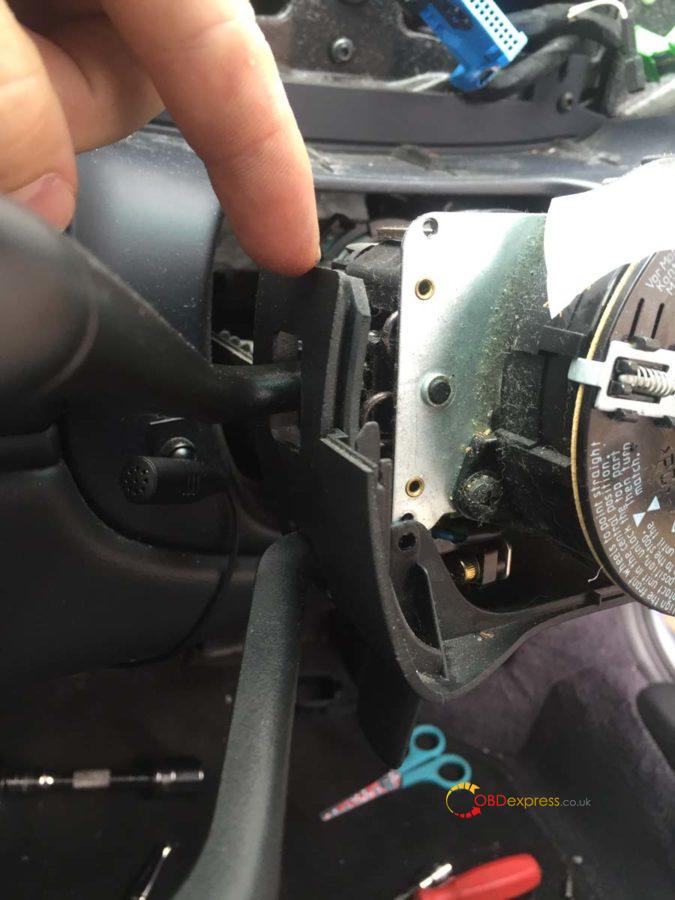
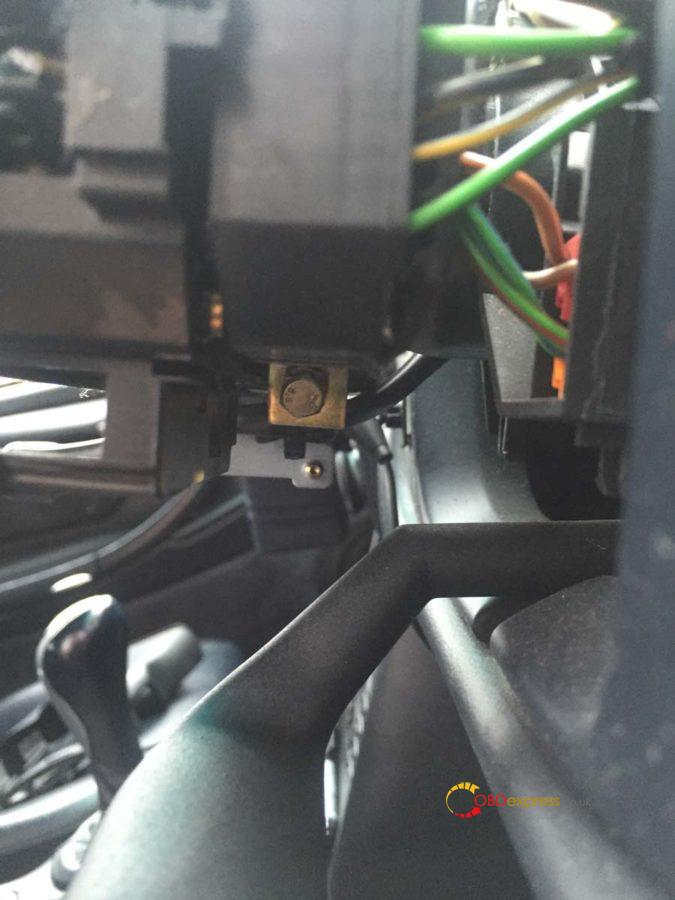
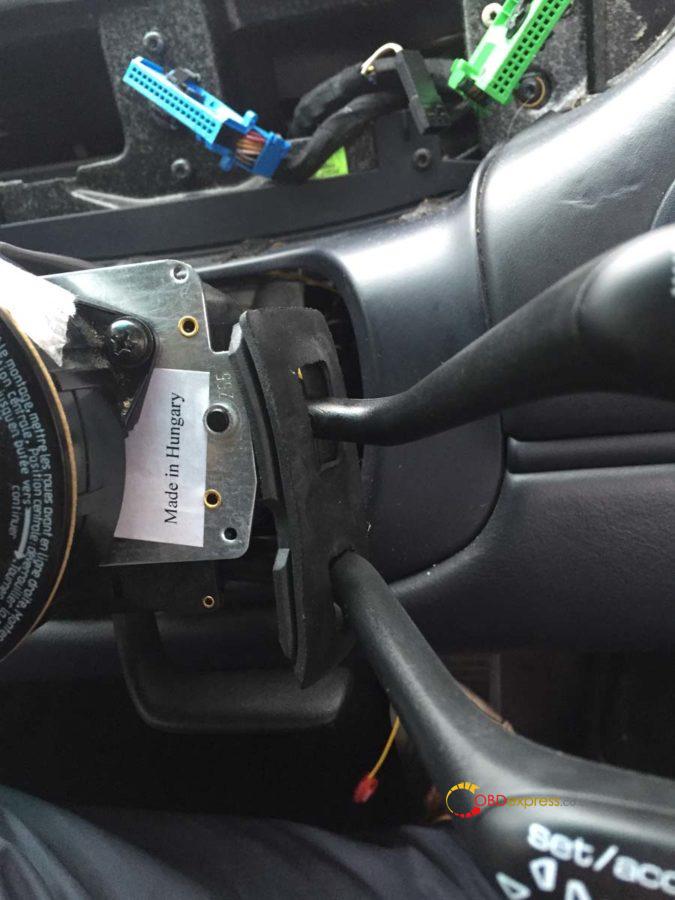
Measure the position of your current stalk cluster to the end of the steering shaft. It should be 55mm. Mark this position on the shaft as we’ll need to put the new stalk cluster at the same point. Now loosen the bolt you can see in the image below, don’t undo it fully.
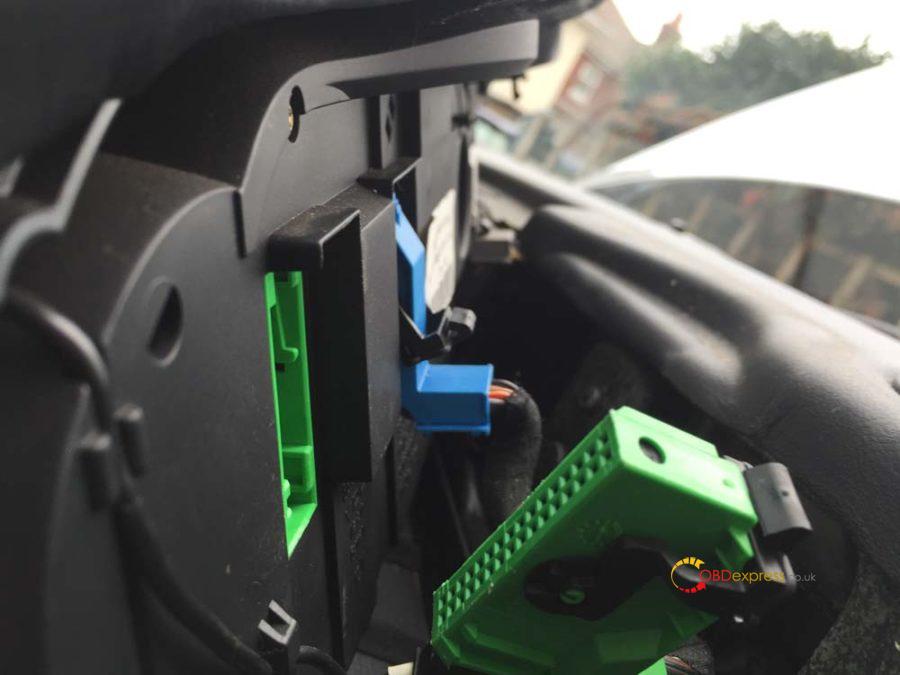
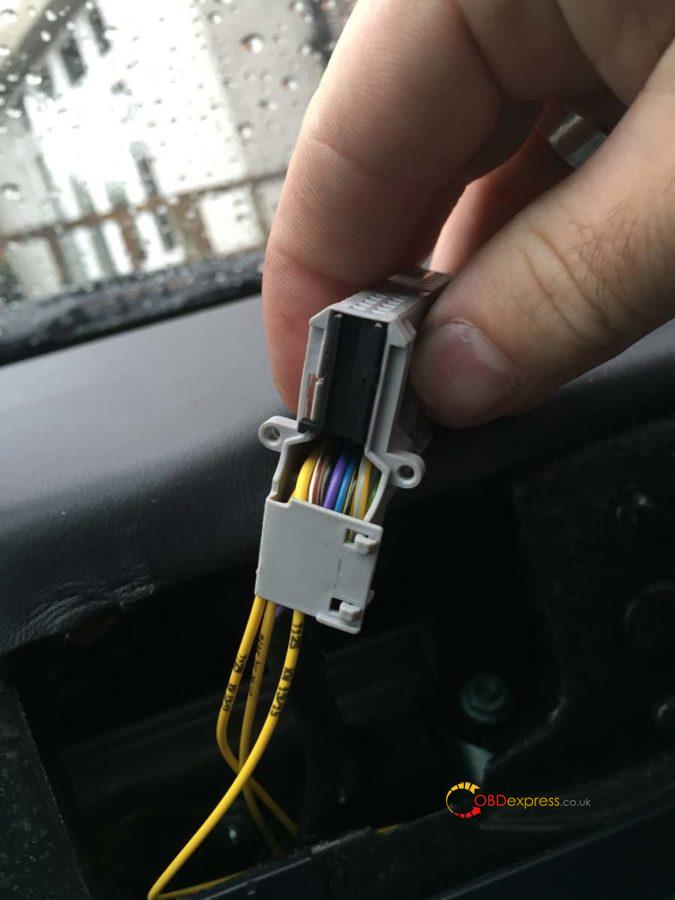
Disconnect the two large connectors either side of the stalk cluster and then remove the stalk cluster from the steering shaft.
This is one of the large connectors.
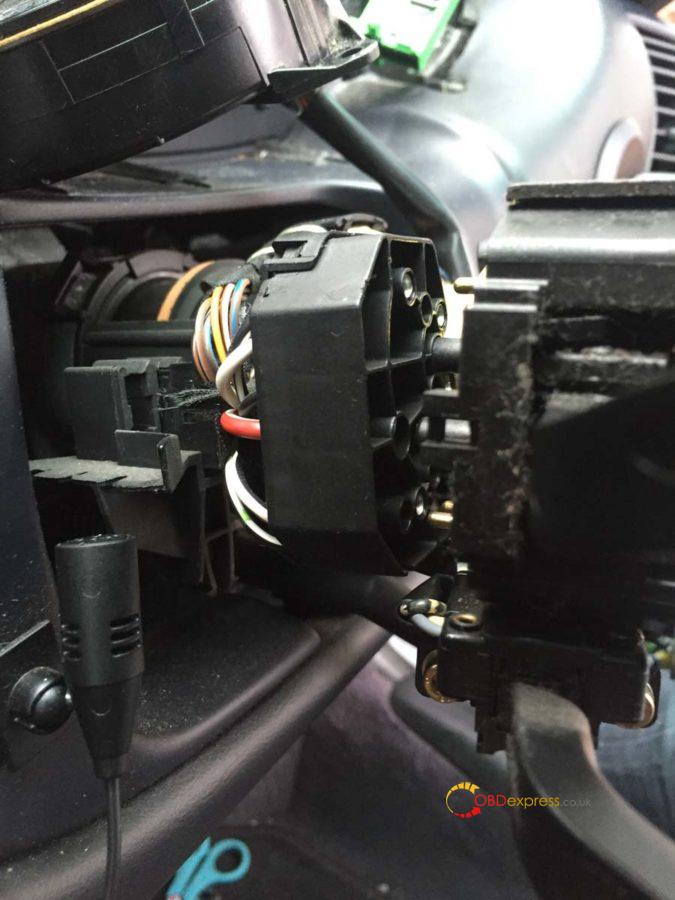
If you have the OBC you’ll find a smaller additional connector you need to undo. It may be housed in the small black clips you can see in the background of the image below.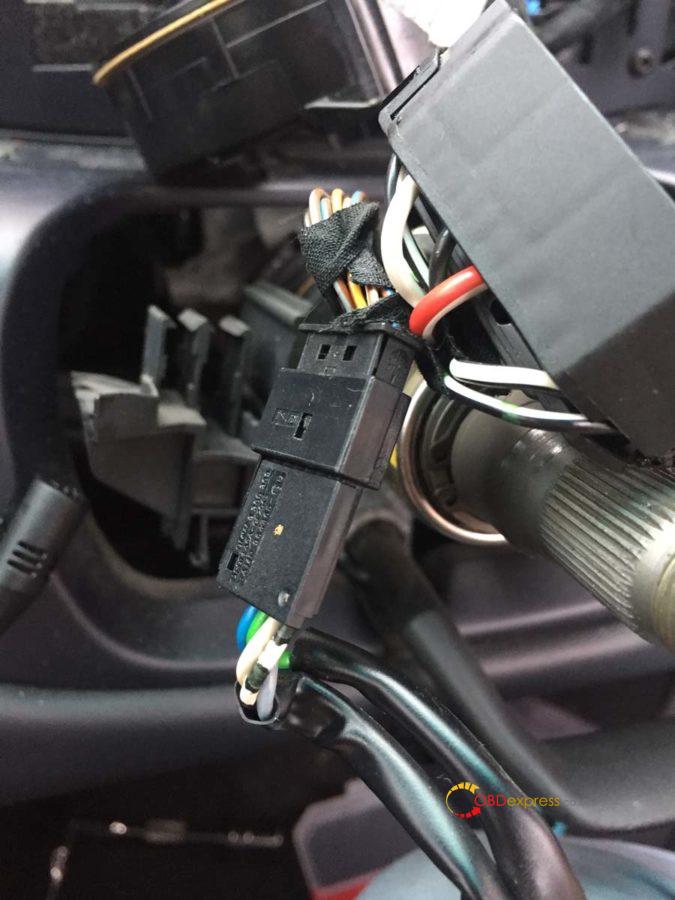
I found this clip a real pain to undo. Use your blunt knife to stick in and undo the latch (for reference in the image I pushed the knife down into this connector from the top and lifted it up slightly to free that tiny bit of plastic in the hole.
It was at this point I stopped for some tea and also gave the dash a good wipe down as it was very dusty.
Step 5 – Wire up and fit the new stalk cluster
Take the 4 yellow VW repair wires and plug them all into the small 4 pin connector you bought. You’ll find the numbers 1 and 4 on one side of the connector indicating which is pin 1 and which is pin 4.
Using the snap-lock connectors, attach the yellow wire from pin 2 to the piece of 1m wire. This will need to be routed down to the fuse box which we’ll cover off in the last section.
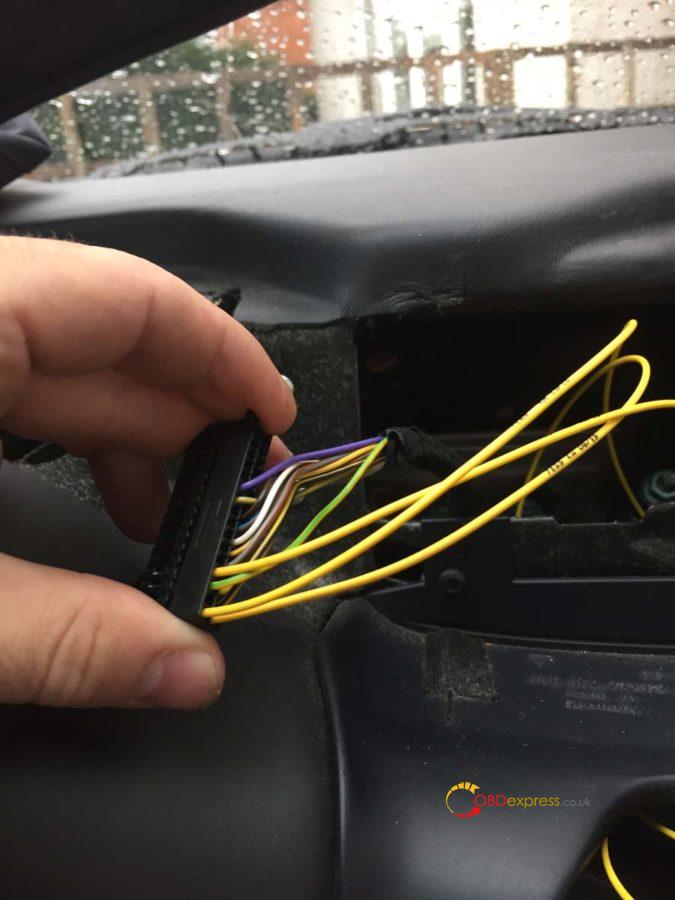
Pins 1, 3 and 4 will be plugged into the gray instrument cluster connector.
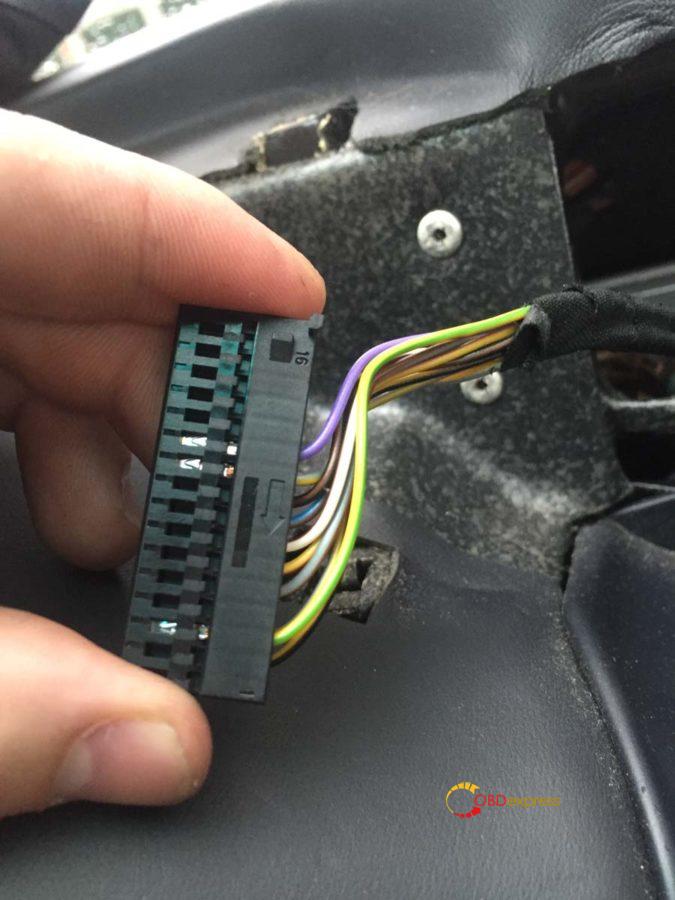
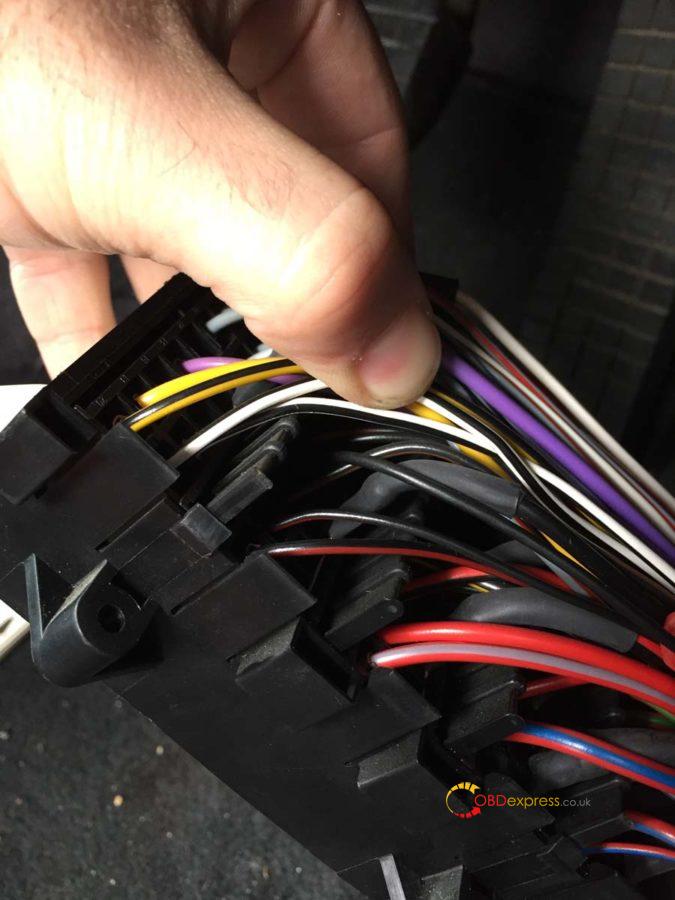
On the gray connector you’ll see a sort of door which is protecting the cables and keeping them tidy, undo this. On the side of the connector you’ll see a small latch that will allow the black bar the cables are plugged into to slide out. Remember which way you took it out as it must go back in that way.
Like before you’ll find numbers at either end of this connector indicating the pin slots. This is a double decker so pins 1-16 are on the top and 17-32 are on the bottom.
Feed the wire from pin 2 of the stalk cluster down the right side of the steering shaft and into the drivers footwell. You should be able to poke your hand up from underneath to help pull it through.
One at a time, feed the other remaining yellow wires from the stalk cluster through the left side of the steering shaft and up through the top slot of the dash (it should follow the same path as the gray connector). Connect the wires to the following slots on the gray connector:
Stalk cluster pin 1 > instrument cluster pin 17
Stalk cluster pin 3 > instrument cluster pin 4
Stalk cluster pin 4 > instrument cluster pin 1
So it should look like this:
Doing it one at a time means you should connect the correct cable to the correct slot.
Push the connector bar back in and close the wire door keeping the wires tidy.
Plug the cruise connector we’ve just wired up into the stalk cluster and also plug in the OBC 5 pin connector. Using some small cable ties, tie the wires together and tidy it up.
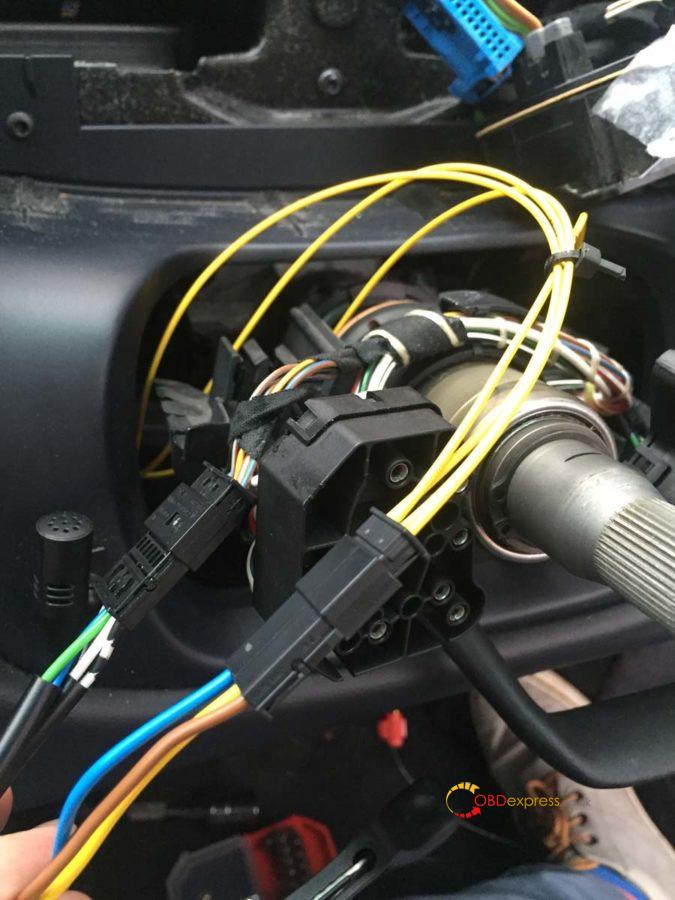
Place the two connectors in these slots to keep them secure. The OBC, if you have it, should have been in one of these already.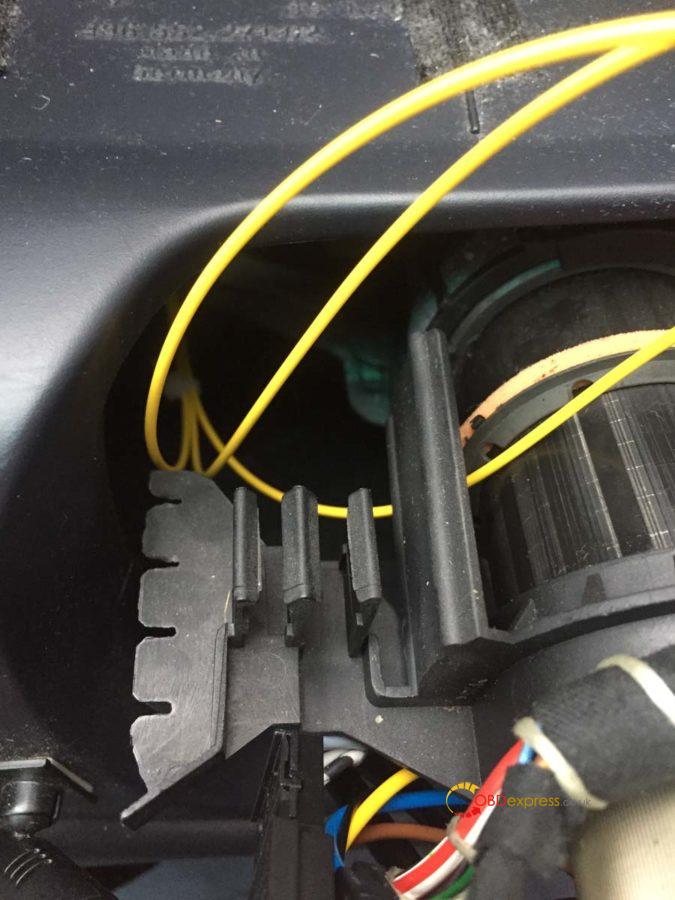
Step 6 – Fit the new stalk cluster
These steps are now basically the reverse of what we’ve done to get to this point. Slide the new stalk cluster onto the steering shaft and back to the same position as the old one (55mm from the end of the shaft). Tighten up the bolt from underneath when it is in position and straight.
Reconnect the large connectors at the back of the stalk cluster.
You can now slide on the rubber grommets. The left side is easier than the right as both the indicator and OBC stalks move to the center. Be careful with the cruise stalk as it doesn’t feel like it wants to move up for you to get the grommet on.
Reattach the clock-spring connector unit, the steering column panels and faceplate. You can now remove the tape holding the clock-spring connector unit.
Push on the steering wheel. The two plastic prongs on the clock-spring connector unit feed into two slots on the steering wheel.

This is the back of the steering wheel – the two slots top and bottom is what I referenced above.
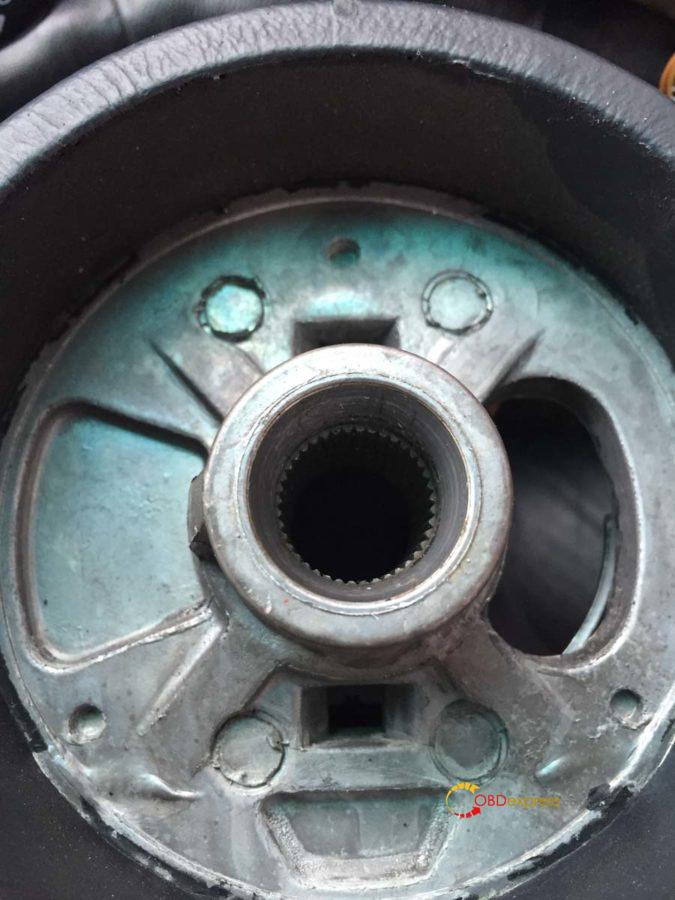
Tighten up the nut to attach the steering wheel and tighten it so your marker pen is back in line. Plug in the two spade connectors and re-attach the airbag.
Now to re-attach the instrument cluster. Swivel it back around into position and re-attach the 3 coloured plugs plus the microphone cable. Push the plugs in and pull the black bar down to secure it in place. The cluster should slot back in without too much trouble, remember to tighten your screws and push your hazard button and trim back into place.
Everything should now be done and your 996 should be drivable…apart from the last wire we need to connect to the fuse box.
Step 7 – Connecting the stalk cluster to the fuse box
Take off the fuse box cover and undo the 4 screws holding it in place. This should allow you to remove the carpet surround.
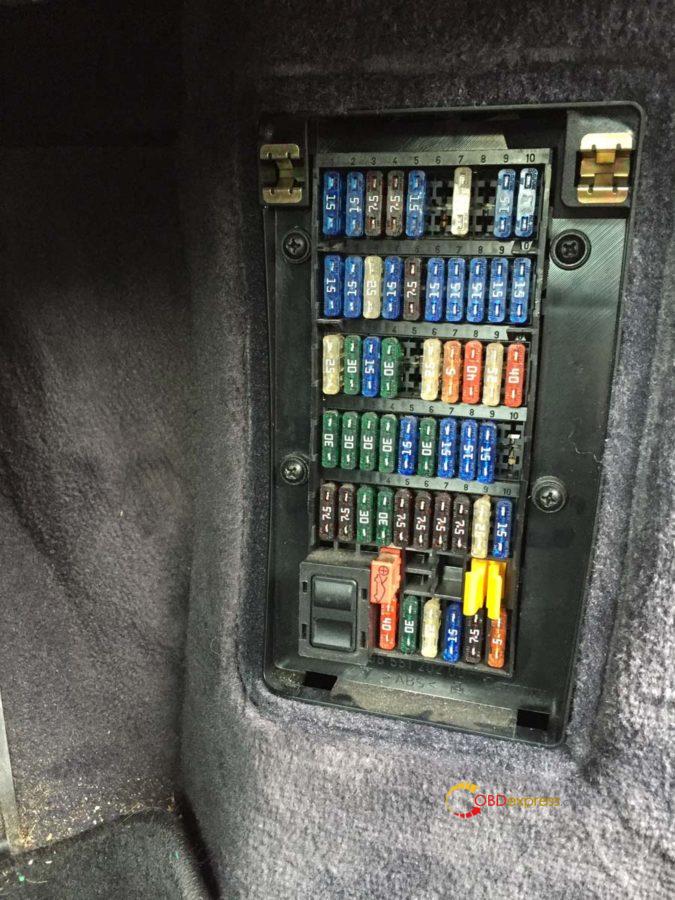
There are 4 clips on the side of the fuse box holding it in place, using your blunt knife press it into each clip to release it.
The fuse we need to connect to is B7. This is the second row from the top and the 4th fuse in from the right (as indicated by the number sequence).
Run the cable along the bulk of cables to the fuse box so you know what length you need and trim the cable down.
Find the black wire and using a snap-lock connector, attach your cable.
My 1m wire was black as well and you can see that running off to the right of the picture.
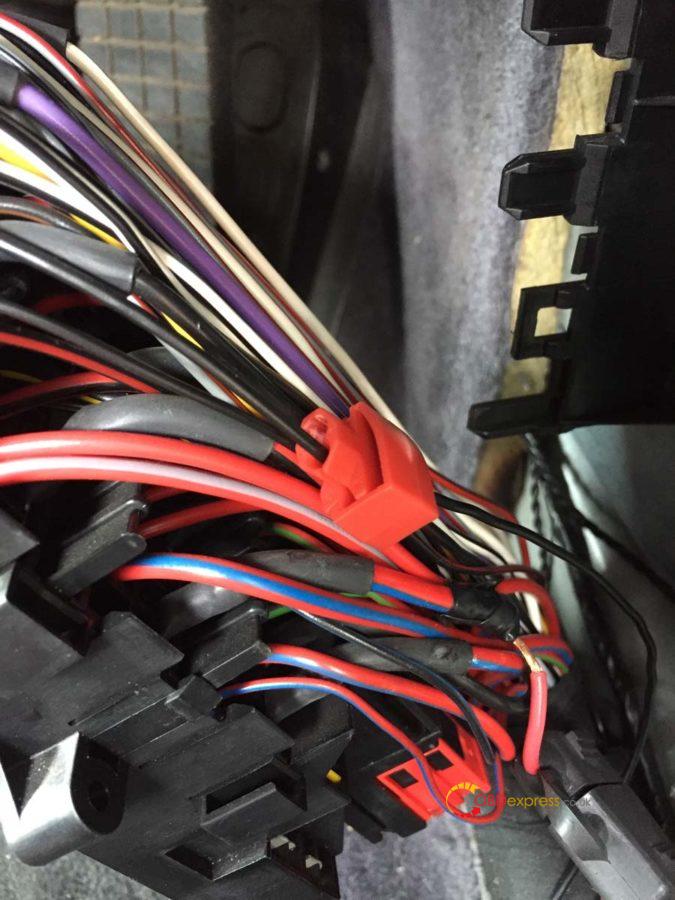
You can see the black cable just under the white and black one I’m holding. It crosses over a brown and black cable.
Tidy the cables up and push the fuse box back into its holder. Using some cable ties attach the new wire to the bulk of wires to keep it tidy. Put the carpet surround back and you’re done.
Now take a drive to your local OPC and get them to enable the cruise control coding in the DME (or anyone with a PST2 or PIWIS Tester in engineering Mode).
Project "Fix my broken indicators and retro-fit cruise controlâ€.…completed it mate!
Credits to @ Leon1davies.
Source of PIWIS Tester 3 with engineering Mode that can enable the cruise control coding.
http://www.obdexpress.co.uk/wholesale/piwis3-porsche-tester-diagnostic-tool.html
Source:http://blog.obdexpress.co.uk/2020/03/21/how-to-retrofit-cruise-control-of-porsche-996-2002-2005/
Posted by: OBDexpress.co.uk at
08:50 AM
| No Comments
| Add Comment
Post contains 2483 words, total size 33 kb.
March 17, 2020
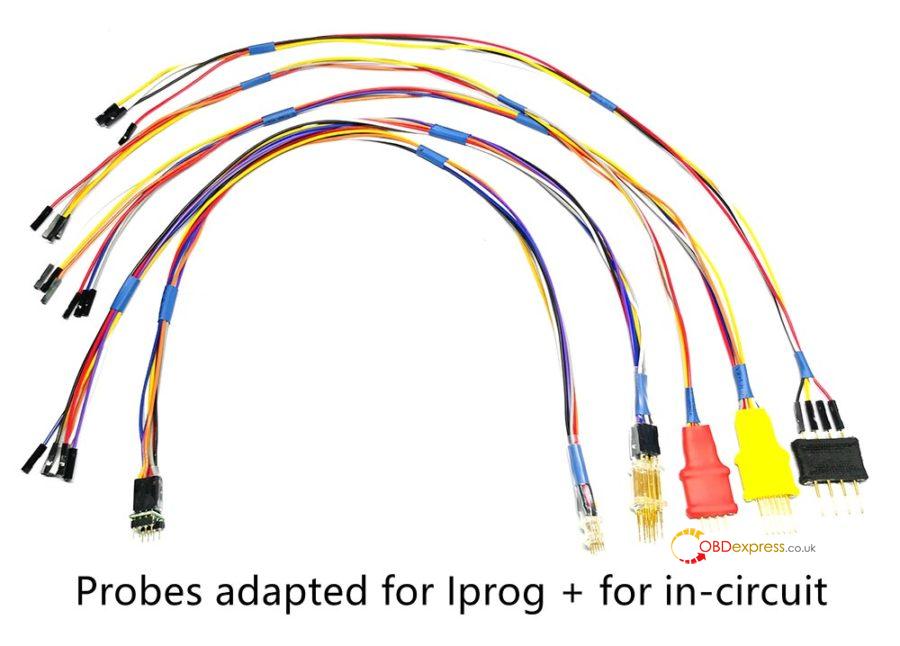
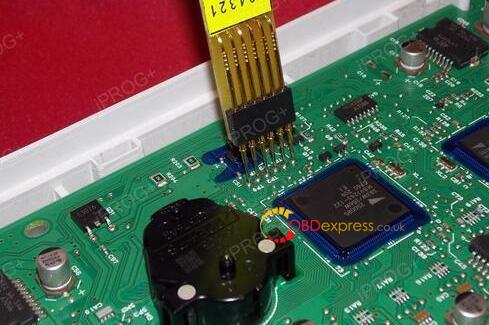
Look at the 5 probe adapters:
Testable ECU programmers:
iprog+ clone:yes
xprog:yes
More are testing.
Purpose:
With the aboveprobe adapters, you can use iprog+ clone or xprog without welding the lines, for example, when you use Iprog to program the dashboard of 584321, just put the probes adapter at the contact points without welding, the job will be easier.

Price:
5 probe adapters price: 46EURO
http://www.obdexpress.co.uk/wholesale/probes-adapters-for-iprog-xprog-m.html
Iprog+ Iprog Pro With 7 Adapters Plus Probes Adapters:139EURO
http://www.obdexpress.co.uk/wholesale/iprog-pro-full-version-plus-probes-Adapters.html
xprog + 5 probe adapters price: 214EURO
http://www.obdexpress.co.uk/wholesale/xprog-v612-ecu-programmer-plus-probes-adaters.html
Enjoy!
Posted by: OBDexpress.co.uk at
03:30 AM
| No Comments
| Add Comment
Post contains 115 words, total size 3 kb.
March 12, 2020
Xentry Diagnosis Kit 3 user guide is available at:
Size: 113 pages
Thanks for @ Joseph~ sharing, I do not recommend anyone to buy this device cloned as MB can brick it anytime. latest Xentry has 3 timebombs that can take action anytime
stick with MB SD C4 DoIP, without batteries of course, to avoid getting bricked !
MB SD C4 DoIP user manual:
- How to setup MB SD Connect C4 Plus Wi Fi?
- How to Setup DTS Monaco software for MB SD C4 DoIP Plus?
- How to setup DOIP on MB SD Connect PLUS?
- MB SD Connect C4 DOIP XENRTY Test BENZ E213
DTS MONACO and Vediamo user guide:
Have the two Moe Diatronic training books.


C3 & C4 tech support:http://www.obdexpress.co.uk/wholesale/mb-star-series/
Source:http://blog.obdexpress.co.uk/2020/03/11/xentry-diagnosis-kit-3-user-guide-c4-user-guide/
Posted by: OBDexpress.co.uk at
07:16 AM
| No Comments
| Add Comment
Post contains 135 words, total size 19 kb.
March 11, 2020
Car model and ECU type:
BMW E60 530d
it's a dde 5 (m50d57a0) (bosch edc16c31) cas 2
It got water damage on the ecu and it fried it.
Purpose:
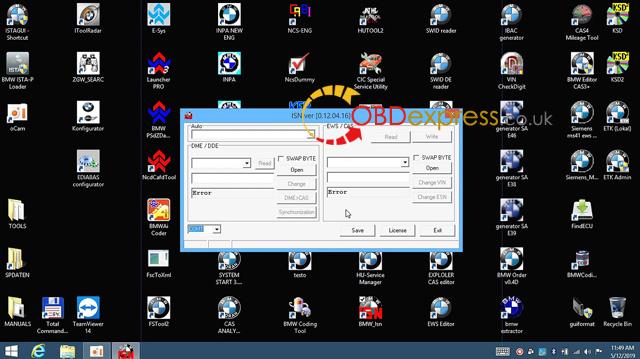
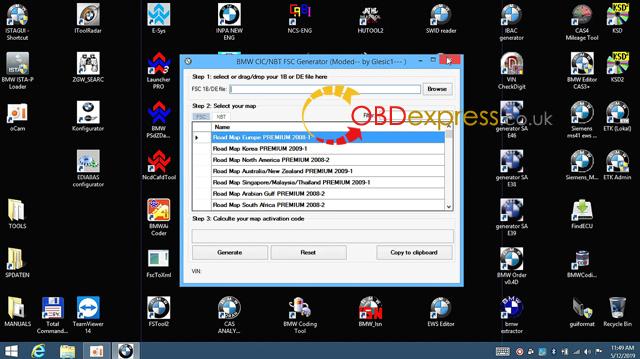
Got a new ecu with the same numbers but need a tool to read isn from cas, write to ecu and change vin on ecu.
E60 Bosch edc16c31 ECU programmer advice:
Possible solution 1:
You can do a BDM read with KTAG, that that will give You the option to read MPC/External Flash/EEPROM. You can do the full read and make a backup, so You will not be worried after something goes bad. For ISN change You need the EEPROM read. Than find on this forum BMW ISN tool, that will help You read and modify the ISN number in dumps.
It would be better if You had the original EDC unit, so You could just read and copy EEPROM, that would be way easier. But as You don't have it, than You will need to buy one more tool. Get R270+ or Xprog, because You will also need to read CAS EEPROM. As You can't read the original ISN of Your car with tools You have unfortunately. These tools aren't too expensive, and as You are a beginner I'd suggest R270+. The software includes a photo instructions on where to connect BDM cables in CAS unit, so it will be rather fast and easy job.
With R270 read only CAS EEPROM, You don't need Flash. Open BMW ISN editor, load the EDC dump, load CAS dump and in ISN editor You will find the option to copy ISN from EDC to CAS, click on that, then click on DDE<->CAS synchronization in ISN editor, save the new dumps and write them back to EDC and to CAS. That should give You the programmed and synchronized immobilizer.
After that, connect the ISTA-P to the car, click the option, that You changed the engine control unit and calculate the programming plan. ISTA will suggest You the correct software number to program, and You can do that with ISTA or load the soft with WINKFP, depending what software You prefer. It might seem complicated, but it's really easy job to do. And if You ever find Yourself in such situation again, do not throw the damaged ECU until You copied the memories. It really can help to make things easier and faster.
Possible solution 2:
There are tools which can help you but as you don't want to spend money on them so
You have this option....you have to buy DME and CAS with keys or with keys
1. If you bought DME, CAS and keys just install in the car and itwill start....reprogram the modules using Autel MS908 P or ISTA-P so it'll change VIN number to match your vehicle
2. If you bought DME, CAS only then you have to make key for it and reprogram the modules using Autel MS908P or ISTA-P
or you have to at least buy FVDI/SVCI to read ISN from DME and it'll give you the option to write that ISN in CAS2
ISN on this model is 4 digits so its easie.
(Although I use Original AVDI and it work great for this stuff but again too much expensive if you will not be doing in regular basis)
***However, someone don't agree and says:
You can't change VIN in CAS with ISTA or WINKFP, You still need programmer unfortunately. AVDI is rather expensive (but great tool, have the original and it's pretty handy). Also after fitting the used CAS there will be manipulation dot on instrument panel and the mileage between CAS and Instrument will be different. In some countries that's actually a big problem right now.
That's all.
Thanks!
No images attached, for the details of the ecu programmers mentioned above, please refer to www.obdexpress.co.uk
Source:http://blog.obdexpress.co.uk/2020/03/10/bmw-e60-530d-ecu-programming-tool-advice/
Posted by: OBDexpress.co.uk at
02:43 AM
| No Comments
| Add Comment
Post contains 651 words, total size 5 kb.
March 05, 2020
One user feedback his VCM2 IDS V86 need the activation code to active your license (shown as following image). One question, how to get the license?
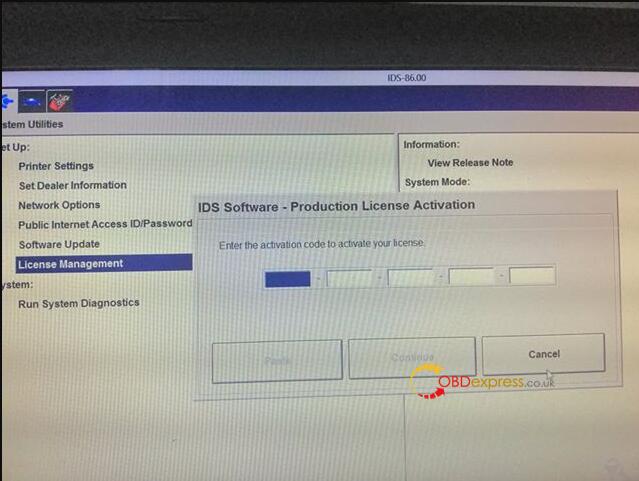
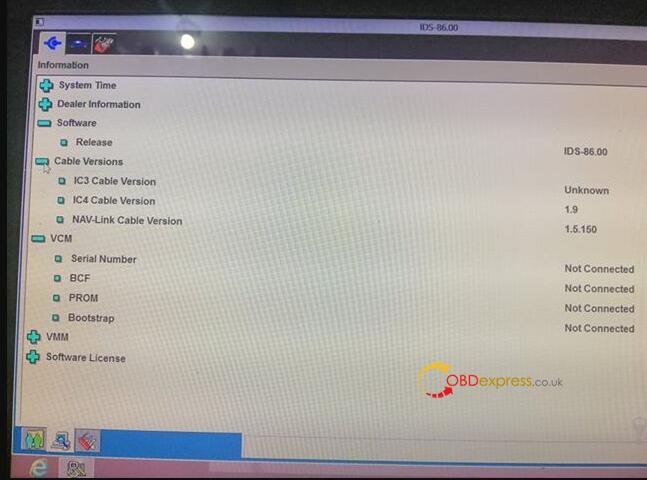
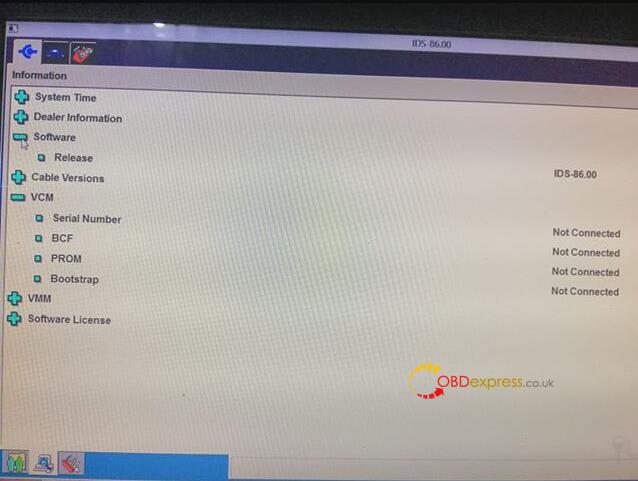
Obdexpress.co.uk engineer replied:
Because the patch is not installed, there is one patch in the CD.
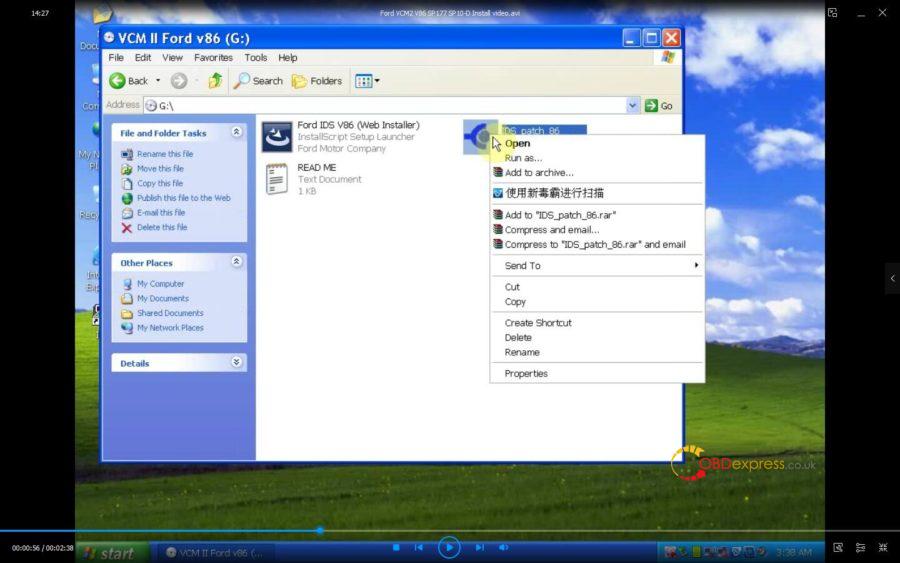
You can also watch the below youtube video:
Good luck!
Source:http://blog.obdexpress.co.uk/2020/03/05/vcm2-ids-v86-activation-code-how-to-get-it/
Posted by: OBDexpress.co.uk at
05:57 AM
| No Comments
| Add Comment
Post contains 62 words, total size 3 kb.
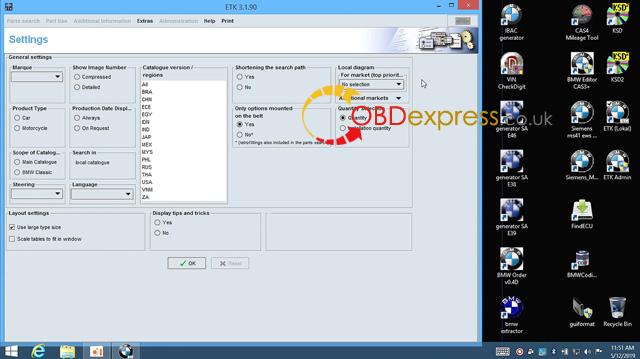
March 03, 2020
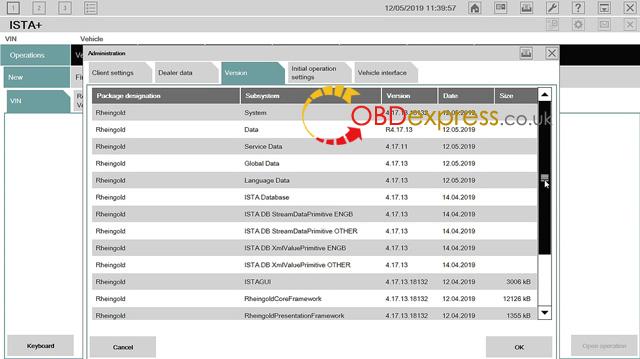
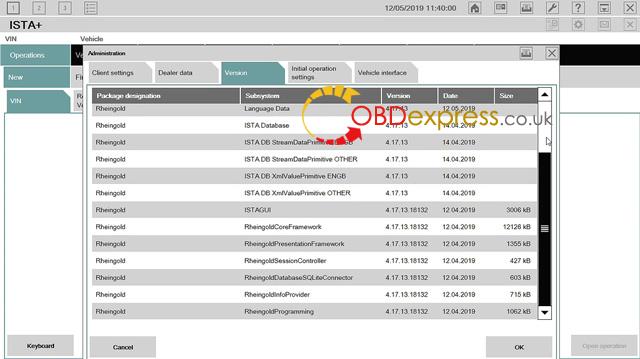
Tested version:
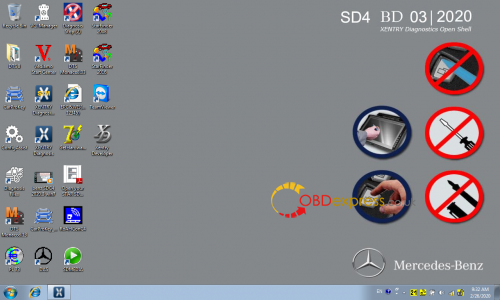
03.2020 XENTRY Openshell XDOS HDD
http://www.obdexpress.co.uk/wholesale/2020-03-mb-star-sd-c4-hdd.html
03.2020 XENTRY Openshell XDOS SSD (running faster & more stable)
http://www.obdexpress.co.uk/wholesale/202003-mb-sd-c4-software-ssd.html
Security:Safe, you can use it relief.
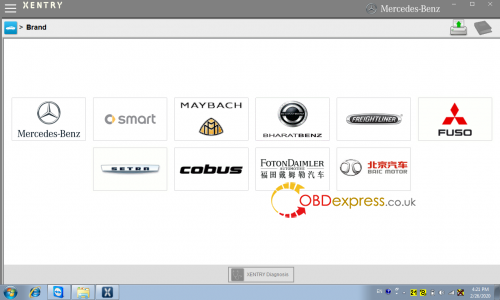
v03/2020 Xentry OpenShell XDOS is confirmed working perfectly with 12v/24v Mercedes Car, Bus, Truck, Sprint, Smart ,(from 1989 to the 2019 year)
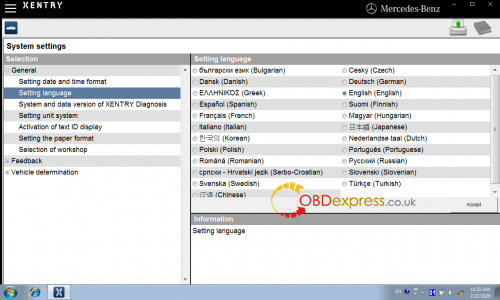
Support languages: English, Croatian, Czech, Danish, Dutch, Finish, French, German, Greek, Hungarian, Italian, Japanese, Korean, Polish, Portuguese, Romanian, Russian; Spanish, Swedish, Turkish, Chinese.
Software confirmed!
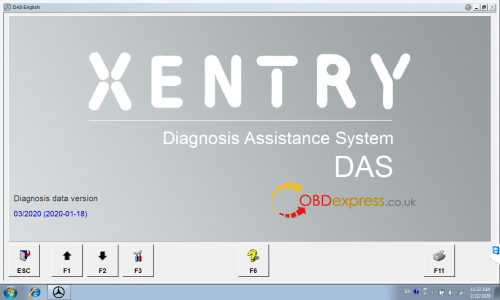
1.D-A-S / Xentry 2020.03……….Confirmed!
the automatically Diagnosis Assistance System, Concise interface and straightforward operation with IB M high-quality computer can realize the quick and accurate code reading and the whole car system testing
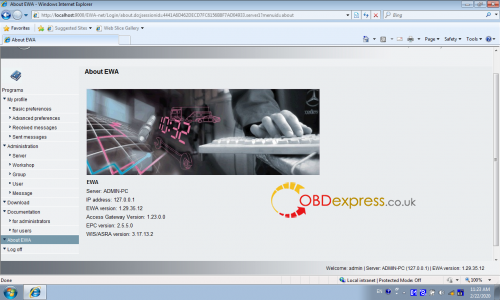
2.W-I-S net 2018.11……….Confirmed!
Workshop Information System Supply the whole view of the wiring diagram in a car,component location diagram and maintenance method. What you do is to enter the chassis number, and then you will get the manufacture data, engine configuration and the car model -all in detail.
3.EPC.net 2018.11……….Confirmed!
Electronic Parts Catalog
4.ST Finder ……….Confirmed!
Part Location Finder options: 2008 and 2016
- STARUTILITIES……….Confirmed!
the movement management system and self-test
- SDMEDIA 2014……….Confirmed!
- PL73 2019 ……….Confirmed!
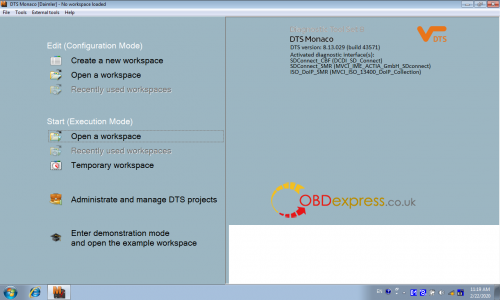
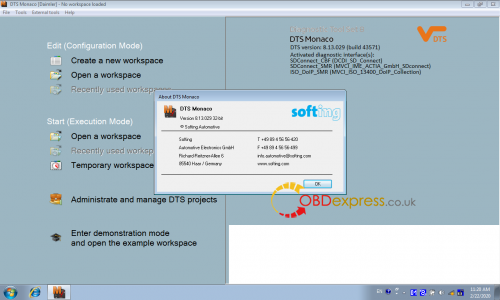
- DTS Monaco 8.13.029
- HHT-WIN
- Vediamo 5.01.01
- Vediamo Database 2019
Function confirmed!
Coding……….Confirmed!
Full Diagnostics……….Confirmed!
reading trouble code……….Confirmed!
erasing trouble code……….Confirmed!
reading live-data……….Confirmed!
adaptation……….Confirmed!
maintenance……….Confirmed!
component testing……….Confirmed!
information consultation……….Confirmed!
component location diagram……….Confirmed!
wiring diagram……….Confirmed!
flash code……….NOT worked!
(Notice: mb sd software will no support online coding after v2019.12, if you wantSCN Online Coding Function, pls buy v2019.09 sd c4 software:V09/2019 HDD,V09/2019 SSD)
Source:http://blog.obdexpress.co.uk/2020/03/02/03-2020-xentry-das-xdos-download/
Posted by: OBDexpress.co.uk at
02:27 AM
| No Comments
| Add Comment
Post contains 250 words, total size 6 kb.
32 queries taking 0.0234 seconds, 125 records returned.
Powered by Minx 1.1.6c-pink.

